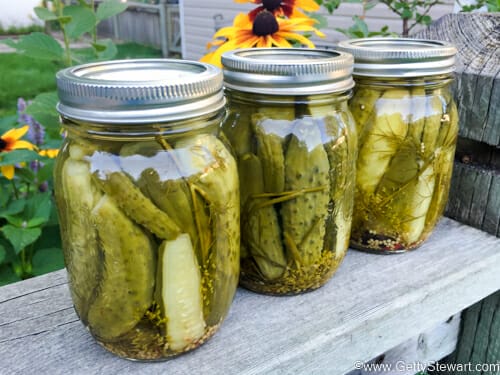
Classic Dill Pickles – Small Batch
We love classic dill pickles. Sure we enjoy pickled beets, hot pepper rings, or dilly beans, but the star of the pickle jar is by far the dill pickle.
Also Read: Pickled Beets, Hot Pepper Rings, Quick Pickled Onions, Dilly Beans, Ten Steps to Quick Refrigerator Pickles
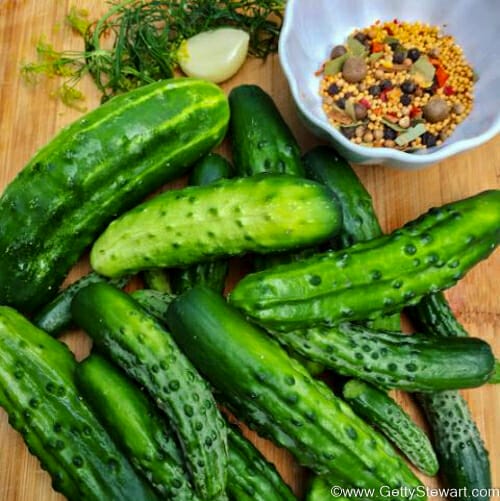
Look at all these gorgeous young cukes just waiting to become dill pickles! They’re a hodge podge of varieties, which I planted so we can have both pickles and salad cucumbers. For those who want nothing but the best pickling cukes, be sure to plant varieties intended for pickling (eg. National Pickling, Homemade Pickles, Kirby, etc.).
Here’s a cool fact about making pickles – you can make a small batch of pickles that are shelf stable in under an hour with just 4 pounds (2 kg) of cucumbers. You don’t even need a big enamel canning vessel! It’s true. I make small batches of pint sized (500 mL) jars that I can fit in a large stock pot. This allows me to vary the batch size according to how many cucumbers I have at any one time. It also allows me to try out different spices or brines – if my family were open to experimenting.
That said, if you prefer to avoid canning and just have a few pickles in the fridge, check out Ten Steps to Refrigerator Pickles.
Do you have to Hot Water Bath Dill Pickles?
Yes. I process my pickles in a hot water bath. It is the right and safe thing to do. I do not want all my efforts of growing these pickling cukes and turning them into pickles to go to waste.
The National Centre for Home Food Preservation – the leading source for all things current in the world of canning – says:
Pickle products are subject to spoilage from microorganisms, particularly yeasts and molds, as well as enzymes that may affect flavor, color, and texture. Processing the pickles in a boiling-water canner will prevent both of these problems.
And really, it’s not that difficult or time consuming considering everything you’re doing already anyway.
And, if you follow the tips after the recipe – you will still get nice crisp and delicious pickles.
Ready to try? Here’s our favorite recipe for garlic dill pickles, followed by some tips to get the crispiest pickles possible.
Again, if you want to avoid canning, here’s Ten Steps to Refrigerator Pickles.
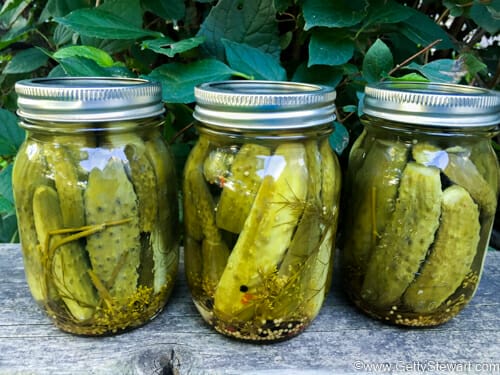
Recipe for Small Batch Classic Dill Pickles
Classic Garlic Dill Pickles
Ingredients
- 3-4 lbs small pickling cucumbers
- 2 cups vinegar
- 2 cups water
- 2 Tbsp pickling salt
- 8 heads dill
- 8 garlic cloves peeled
- 2 tsp mustard seeds
- 1 tsp peppercorns
- 1/2 tsp hot pepper flakes optional
Instructions
Prepare Cucumbers
- Wash and scrub lightly with a soft brush.
- Cut a thin slice from blossom ends to help prevent softening.
- Cut wide cucumbers into quarters lengthwise and long cucumbers in half lengthwise so they fit in jars.
- Place in ice water bath while preparing everything else or up to 8 hours to keep crispness.
Prepare Canner & Jars
- Fill large pot or canner with water so that jars will be covered by 1″ of water.
- Check jars for cracks, wash with warm soapy water, rinse well and place in canner.
- Heat jars in canner (no need to sterilize as final processing will be longer than 10 minutes).
Prepare Brine
- In medium size pot, combine vinegar, water and pickling salt. Bring to boil and simmer five minutes until salt is dissolved.
Fill Jars
- Remove hot jars from canner.
- Place 2 dill heads, 2 garlic cloves, 1/2 tsp mustard seeds, 1/4 tsp peppercorns and 1/8 tsp hot pepper flakes into each pint jar (double if using quart jars).
- Tightly pack cucumbers into jars to within 3/4 inch of rim.
- Add hot vinegar brine to cover cucumbers. Use a plastic utensil to remove any air bubbles and add more brine, leaving 1/2 inch headspace.
- Wipe rim with clean cloth and seal with hot sealing lid. Screw band on top and tighten finger tight.
- Process in hot water bath for 10 minutes for pint (500 mL) jars or 15 minutes for quart (1 L) jars.
- Makes 4 pint (500 mL) jars or 2 quart (1 L) jars
- Processing time from National Center for Home Food Preservation. Remember to adjust cooking times if you’re at altitudes higher than 1000 ft (306 m) above sea level.
Notes
Heat processed, sealed pickle jars will last for years, but for best flavor and texture use within 1 year.
Once opened, store in fridge for six months up to 1 year.
Optional: Add 2 to 3 Tablespoons of sugar to the brine with the salt to cut the acidity of the vinegar without turning these into sweet pickles.
Nutrition Facts (per serving)
Tips for Crisp Dill Pickles
I have never added alum, grape leaves, oak leaves, lime, Pickle Crisp (calcium chloride) or any other crisp enhancing additive to my pickles. Here’s what the National Centre for Home Food Preservation has to say about firming agents:
Firming Agents: If good quality ingredients are used and up-to-date methods are followed, lime and alum are not needed for crisp pickles. The calcium in lime does improve pickle firmness. Food-grade lime may be used as a lime-water solution for soaking fresh cucumbers 12 to 24 hours before pickling them. However, EXCESS LIME ABSORBED BY THE CUCUMBERS MUST BE REMOVED TO MAKE SAFE PICKLES. To remove excess lime, drain the lime-water solution, rinse and then re-soak the cucumbers in fresh water for 1 hour.
Repeat the rinsing and soaking steps two more times. Failure to remove lime adequately may increase the risk of botulism.
I just can’t be bothered and we get pretty good results without using them.
It’s also important to note that correct heat processing is not the culprit of soft pickles, so don’t leave out the hot water bath canning! It’s the cucumbers you choose and how you manage them that will determine the crispiness of your pickles.
Choose Quality Cucumbers
What you put into the jar is what you get out, so use nice firm cucumbers. Avoid store bought cucumbers with a wax coating. You will get crispier pickles by using cucumber varieties specifically intended for pickling. Their size, shape and particularly the thickness of their skin are ideal for the whole pickling process.
Pick and Preserve Right Away
The longer cucumbers are off the vine, the softer they become. Ideally, pickle your cukes within 24 hours of picking. Be sure to store them well wrapped in the refrigerator between picking and pickling.
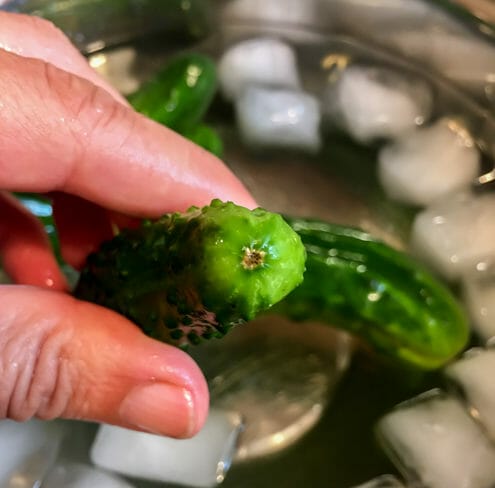
Cut Blossom End
The blossom end of cucumbers contains an enzyme that can lead to softening. Remove it by cutting off the blossom end – just 1/8 inch (3 mm). Cutting the blossom end achieves the same result as adding grape leaves, both eliminate the softening effects of the pectinaze enzyme.
Here’s what the blossom end looks like. If you have issues identifying it, just slice a bit off both ends.
Soak in an Ice Water Bath
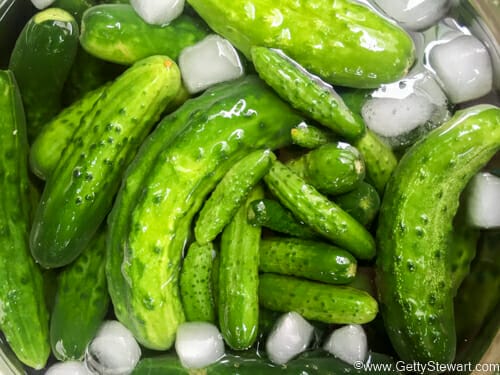
Soaking fresh cucumbers in an ice water bath for 2 to 8 hours makes them remarkably crisp. It’s definitely worth the little bit of effort it takes to do this step. I’ve seen some recipes add salt to the water bath – I’ve never added salt to my ice water bath and find the results to be superb, without it.
Wash and gently scrub cucumbers, cut the blossom end off and then soak them in the ice water bath. The photo above was captured before I cut the blossom ends off – I washed and scrubbed each cuke, tossed it into the ice water bath, then I trimmed the blossom end before storing in the fridge.
Proper Heat Processing
Follow recommended procedures to safely preserve your pickles. By having your hot water bath just below boiling when adding your hot, filled jars, you’ll reduce the time to reach the boiling point and how long your pickles will be in hot water.
Water Quality
Soft water is better for making pickles than hard water. If you have hard water, consider boiling the water you use in your brine for 15 minutes and letting it stand overnight before using.
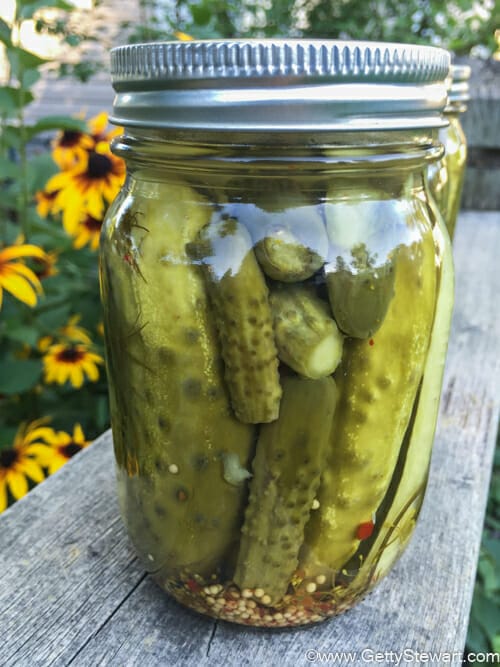
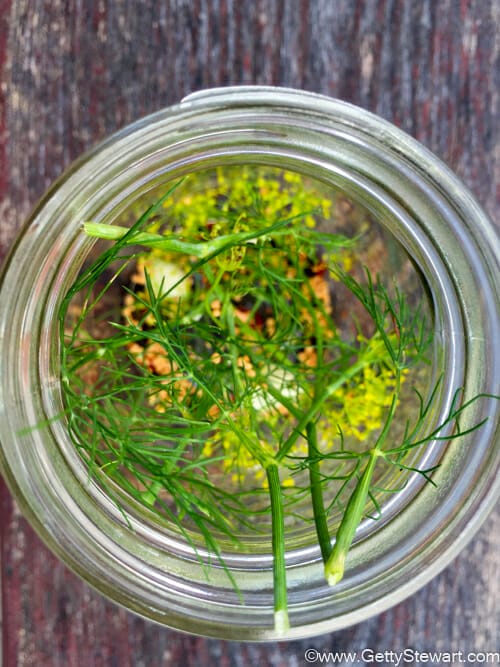
There you have it, my best tips for making a small batch of dill pickles. I hope it makes you realize that it’s totally doable. Now here’s a cool look at the inside of the pickling jar with all the lovely spices.
MORE PICKLE RECIPES
Here are my favourite pickle recipes.
Classic Pickle Brine for Quick Refrigerator Veggies – refrigerator pickles only
Pickled Beets – use as refrigerator pickles or make shelf stable with Hot Water Bath
Dilly Beans – use as refrigerator pickles or make shelf stable with Hot Water Bath
Pickled Hot Peppers – use as refrigerator pickles or make shelf stable with Hot Water Bath
Pickled Red Onions – use as refrigerator pickles only
Now, tell me your pickle story. Do you have a favorite pickle, pickling technique or pickling memory? I’d love to hear from you.
Happy pickling!
Sign up to get articles by Getty delivered to your inbox. You’ll get recipes, practical tips and great food information like this. Getty is a Professional Home Economist, speaker and writer putting good food on tables and agendas. She is the author of Manitoba’s best-selling Prairie Fruit Cookbook, Founder of Fruit Share, a mom and veggie gardener.
Nice and easy recipe! I had a little bit of siphoning occur while waterbathing, I don’t think I left enough headspace. I tried the fridge version, they were delicious, I’m looking forward to trying the canned ones!
Lots of cukes coming in the garden (Parisian Pickling) so I’ll have lots of opportunities to get it right.
Glad you enjoyed the pickles. Keep practicing!
Thanks for the advice. I think I will try my hand at it. This will be my first try. My grandmother always did it when I was a child but she has passed on and did not teach her trade to anyone. I will let you know if I am successful.
Good luck, Brenda!