Homemade Granola for You and for Gifts
Have you ever made homemade granola? It’s one of my hubby’s favorite and so much better than store bought varieties since you get to control the ingredients.

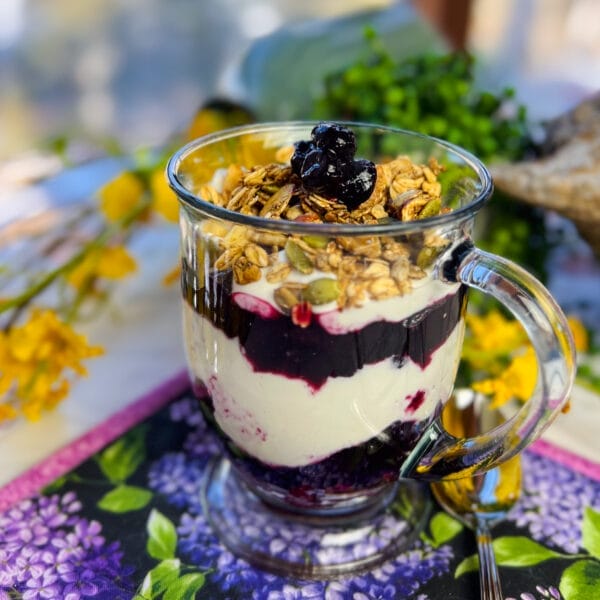
Also Read: Strawberry To Go Parfaits with Granola, Homemade Blueberry Sauce, Grapefruit Parfaits, Carrot Cake Granola
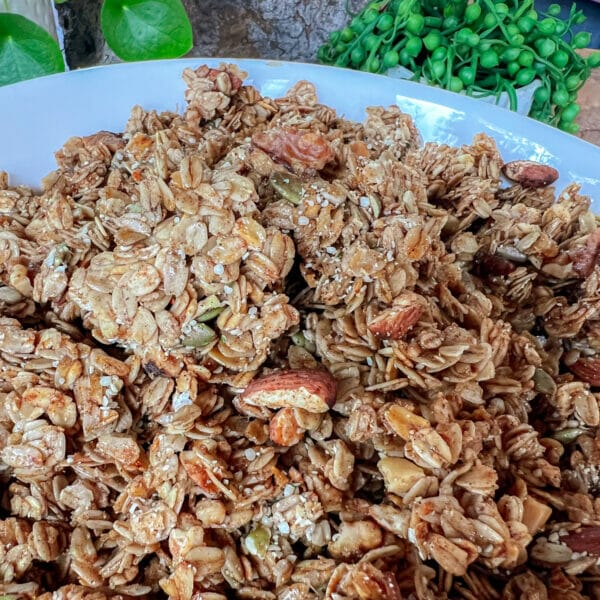
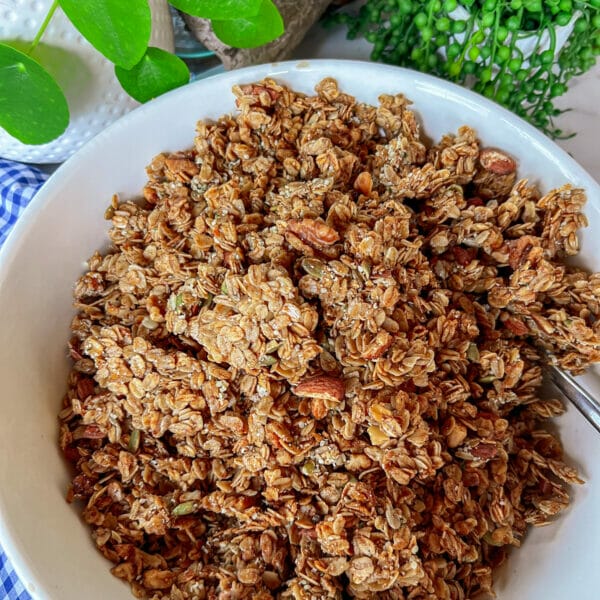
How to Create Clusters in Homemade Granola
Use the right combination of wet and dry ingredients:
- Incorporate a generous amount of sticky binders, such as honey, maple syrup, or agave syrup. These sweeteners act as natural glue to hold the granola together.
- Pro Tip: Honey is the best for holding those clusters together. We’ve all had honey crystalize at room temp – agave or maple syrup doesn’t do that. So if you want guaranteed clusters use honey and consider adding an extra 1/2 cup to the recipe below.
- Include a variety of textures and sizes of oats, nuts, and seeds. The variety of textures helps create clumps and clusters.
- Turn 1 cup of the oats in this recipe into oat flour. The fine texture of the oat flour will help the other ingredients stick together.
Baking granola for clusters:
- Spread the granola mixture evenly on a baking sheet. Crowding the pan may result in steaming instead of baking leading to less clumping.
- Press down gently on the granola before baking. This compacts the mixture and encourages clumping during the cooking process. Use parchment paper for easy removal from pan.
- Bake at a low temperature (around 300°F/150°C) for a longer duration. Slow, gentle baking allows the binders to set without burning the granola. Stirring minimally during baking helps the clusters form.
- Let granola cool completely in pan without stirring:
- Once the granola is baked, resist the urge to stir it immediately. Let it cool undisturbed on the baking sheet. As it cools, the clumps will solidify and become more pronounced.
- After cooling, break the granola into desired cluster sizes. Gentle pressure or tapping with a spoon can help release any stubborn clusters.
Enhance clumping with add-ins:
- Add a tablespoon or two of nut butter, like almond or peanut butter, to the wet ingredients. The extra fat and stickiness contribute to clumping.
- Consider adding a small amount of egg white or aquafaba (the liquid from canned chickpeas) to the mixture. Whisk lightly and incorporate it during the wet ingredient stage. These proteins help bind the granola together.
- Use more honey.
Store and handle with care:
- Store the granola in an airtight container to maintain freshness and preserve the clusters. Avoid rough handling that can break the clusters apart.
- If the granola loses its crunch or clumps over time, place it on a baking sheet and reheat it in the oven at a low temperature for a short time. This can help re-crisp the clusters.
Gluten Free Homemade Granola
My family is not gluten free, but I often serve granola for breakfast when guests are coming, so I want to make sure it’s gluten free for those that need it. If you’re guests are gluten free – ask them for more details and what precautions they need. My guests have always been very appreciative and usually offer to bring their own if they have extreme sensitivities.
Three tips for ensuring your homemade granola is gluten free:
- Read the ingredient list on packages to ensure they are indeed gluten free. It’s surprising where gluten can show up – like spices that may include wheat based fillers or binders.
- Use Certified Gluten Free Oats – oats are naturally gluten free but if they have been processed next to wheat based products they may be contaminated. For those with severe gluten intolerance, this contamination can be significant. In the store, look for oats that are specifically labeled gluten free.
- Be Mindful of Cross-contamination – Thoroughly clean surfaces and use separate utensils, mixing bowls and baking sheets when preparing gluten free granola.
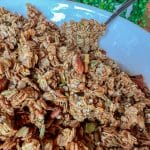
Homemade Granola Recipe
This makes a BIG batch – enough for you and for gifts in a jar. Once cooled, you can freeze it to stay extra fresh if you don’t think you’ll get through it in a month.
Homemade Granola
Ingredients
- 6 cups large flake rolled oats
- 2 cups mixed nuts almonds, hazelnuts, walnuts, pecans, etc
- 1 cup raw seeds unsalted sunflower seeds and/or pepitas (pumpkin seeds)
- 1/2 cup flax seeds and/or hemp hearts
- 3 tsp cinnamon
- 1/2 tsp nutmeg optional
- 2 tsp orange zest optional
- 1/2 cup canola oil or coconut oil
- 1 1/4 cup maple syrup or honey
- 2 tsp vanilla extract
- 1 tsp almond extract optional
- 1 cup dried fruit, optional apple, cranberries, blueberries, raisins, cherries, pineapple, apricots, etc.
Instructions
- Preheat oven to 325°F and line large rimmed baking sheet with parchment paper.
- Pour oats in a huge bowl.
- Using a food processor, chop nuts into dime size pieces.
- Combine chopped nuts, seeds, orange zest, cinnamon, nutmeg and orange zest with oats.
- In separate small bowl, mix oil, syrup, vanilla and almond extract. Pour into oat mix and stir well.
- Pour onto rimmed baking sheet and press firmly so the granola sticks together and forms clusters. Either use two large baking sheets or separate into two batches and bake separately to ensure even baking and browning.
- Bake for 15 minutes, stir and bake for another 8-10 minutes.
- Remove from oven and repeat with second batch.
- Cool completely.
- Add your favorite dried fruit and any other additional items (eg puffed quinoa, cocoa nibs, coconut, etc)
- Place in airtight container.
- Store sealed in a cupboard for several weeks. For longer storage and maximum freshness, keep in freezer.
Video
Notes
Nutrition Facts (per serving)
Is Homemade Granola Cheaper than Store Bought?
Unless you skip or skimp on the nuts and seeds or buy only artisan, high quality granola – homemade granola is not cheaper than what you can buy in the cereal aisle. BUT the flavour and quality of ingredients is outstanding and well worth the price – at least I think so. What do you think? Is it worth making your own granola?
- Taste: If you want to control the flavour and texture of your granola with ingredients you love make it yourself.
- Nutrition: If you want to be confident with the quality of ingredients and the types of fats and sweeteners used – make homemade granola.
- Convenience: If convenience is important – buy your granola or make big batches at a time. This recipe makes about 10 cups of granola. For our family of four, that’s enough for a month. To keep it fresh, I store half in an airtight container in the freezer.
- Cost: Nuts and seeds have become very expensive. Many granola makers include less nuts and seeds now than they use to – Have you noticed that in your granola?! So either you buy “cheap” granola with only a few healthy nuts and seeds or you pay a fortune for granola. Homemade granola isn’t cheap either, especially if you like adding lots of nuts and seeds like I do. Oh and the dried fruit costs a lot too!
- Pleasure: If you don’t like making granola – don’t do it! I love the smell of it cooking and enjoy using my mortar and pestle to crush whole nuts. And unless I’m recipe testing or making a video for you, I rarely follow a recipe, I just toss in what I have – one of my favourite ways to cook!

Interested in other Gifts from the Kitchen?
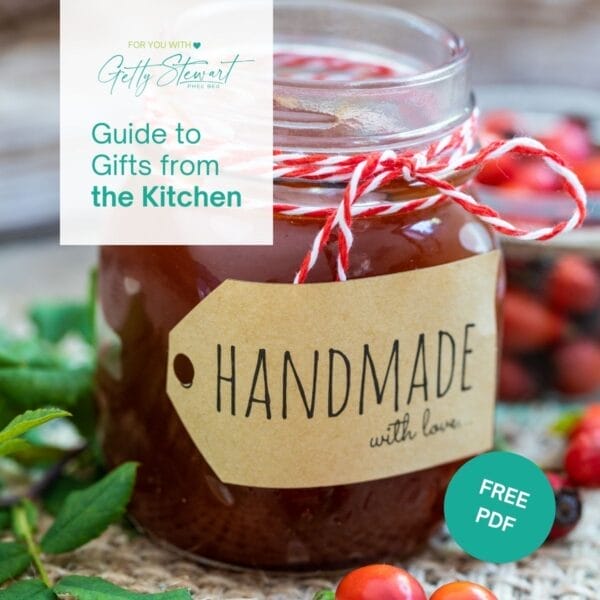
Grab your FREE copy
Download this printable Guide and learn to make beautiful, delicious Gifts from your Kitchen.
Includes tips & links to 50+ ideas for homemade, shelf stable gift giving.
- Cookies in a Jar
- Soup in a Jar
- Flavoured Infusions + Preserves
BONUS printable gift tags
Will you try making homemade granola? If you do, take a photo, post it on Instagram and tag @getgettys so I can see it and like it!
Select, store and serve seasonal food for everyday cooking with Getty. Getty is a food educator and Professional Home Economist, who loves sharing tips and recipes following the seasons from her Canadian kitchen. Sign up to get seasonal tips and recipes delivered to your inbox. Learn more about Getty or check out her books and pdf guides.