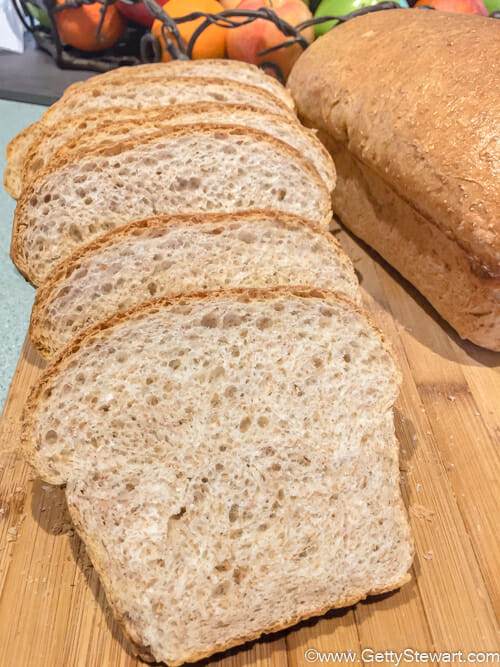
A delicious soft homemade sandwich bread made with 50% whole wheat flour. An easy to make yeast bread for your everyday sandwich bread needs.
I love fresh homemade bread – the smell, the taste and even the process of making it. There’s something so satisfying about kneading the dough, watching it rise and pulling fresh loaves out of the oven. Pure satisfaction!
While I love a good sturdy whole grain, sourdough or rye bread, once in a while I also enjoy a lighter, softer style bread like this one. Unlike other whole wheat bread recipes, this one is quite light and not overly sweet as it’s sweetened with 2 tablespoons of sugar instead of molasses or honey. Even the most staunch white bread lover will enjoy this sandwich bread!
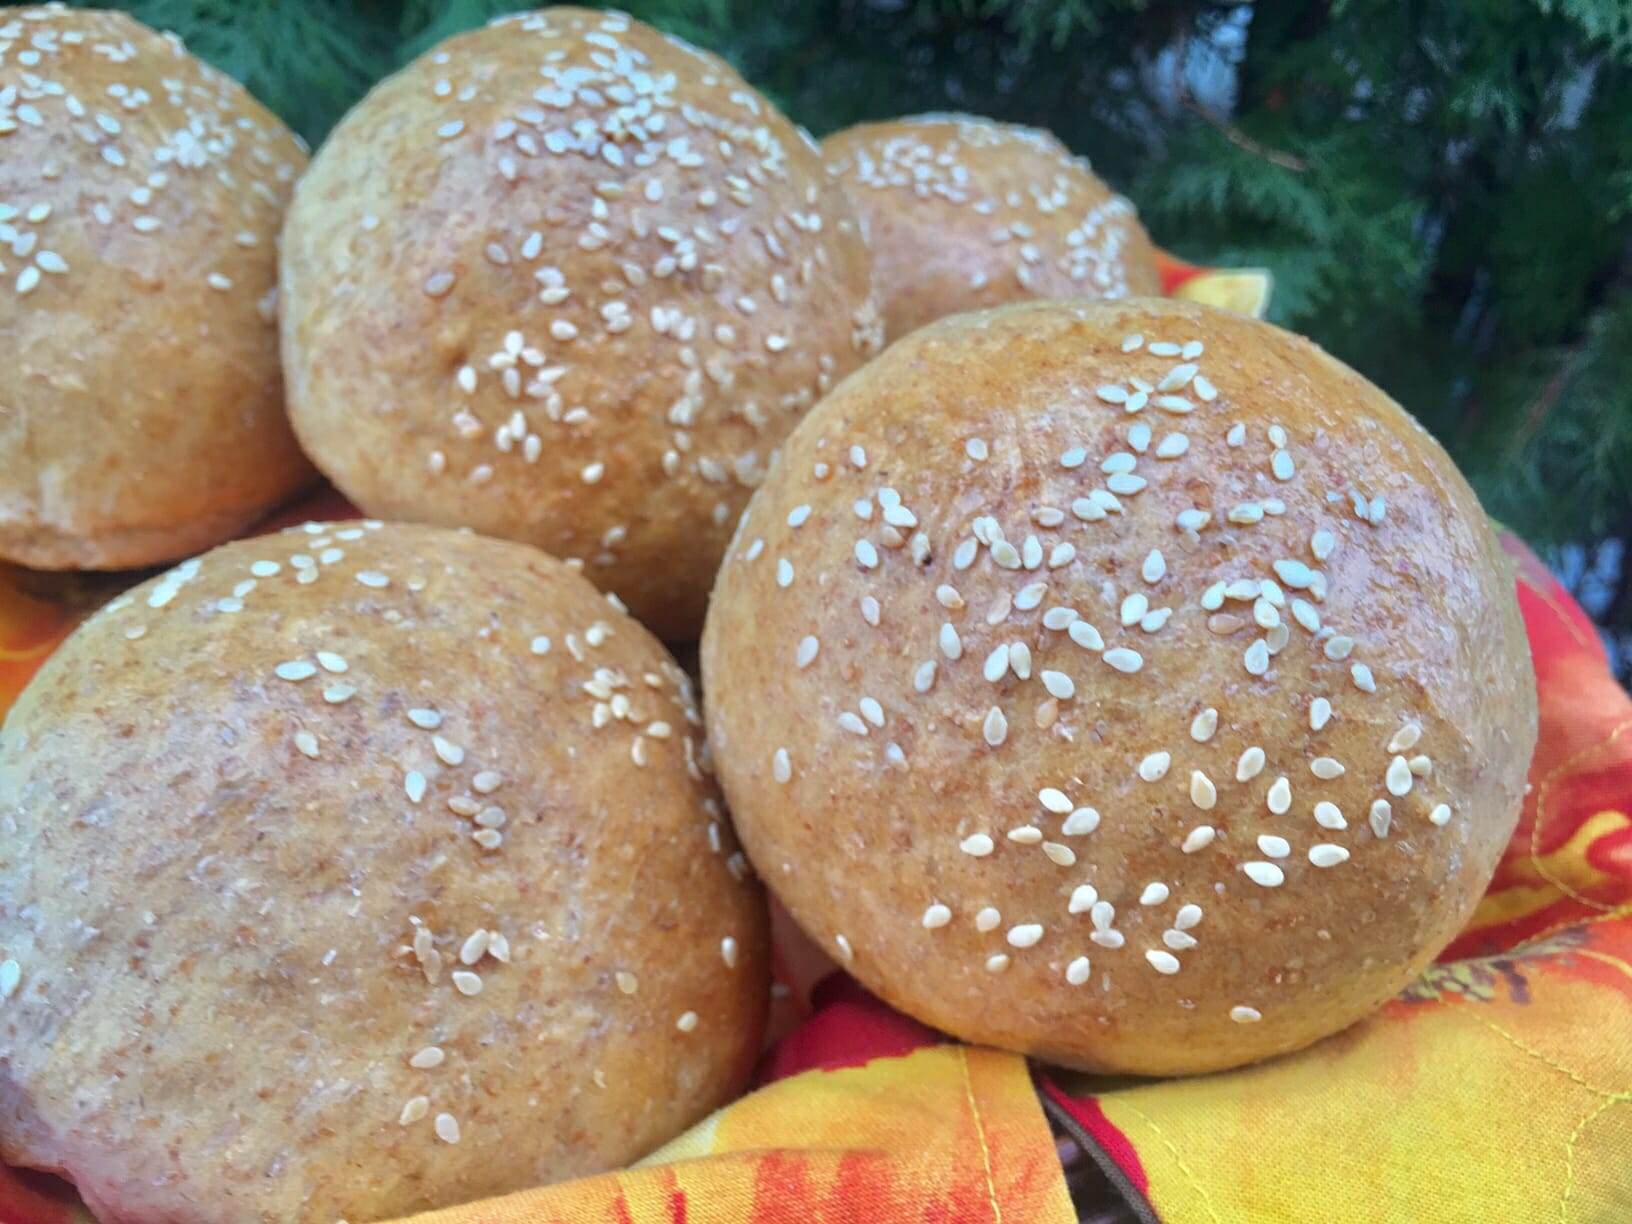
Another great thing about this recipe is that you can also use it to make dinner rolls or hamburger buns. You’re burgers and bunwiches deserve these buns!
For now, give these loaves a try and let me know what you think.
A delicious soft 50/50 bread that's perfect for toast and sandwiches. An easy yeast bread dough that can also be used for dinner rolls or hamburger buns.
Prep : 2 hourshrs20 minutesmins
Cook : 45 minutesmins
Ingredients
2 1/2cupsall purpose flour, divided
2cupswhole wheat flour
1tspsalt
2Tbspsugar
3tspinstant yeast granules
1largeegg
3Tbspcanola oil
1 1/2cupswarm water
Instructions
In a large bowl, combine 2 cups all purpose flour, whole wheat flour, salt, sugar and yeast and form a well in the center.
In a small bowl, whisk egg with oil and warm water (110-115º F or 43-46°C).
Pour liquid into flour and stir together as much as possible. There will be some dry bits of flour left in the bowl.
Transfer dough and bits onto a lightly floured surface and knead for 8 to 10 minutes to form a smooth, elastic dough. Add small amounts of the remaining all-purpose flour as needed to prevent sticking (no need to use it all). Dough is ready when it holds it shape, springs back when poked and feels smooth. It is difficult to over-knead dough by hand, so knead away!
Shape dough into a ball and place in a lightly oiled bowl, turn dough to coat evenly with oil. Cover with a clean towel and let rest for 1-2 hours until dough has doubled.
Punch down dough to release air.
Split in half and shape each into an oval to fit two lightly greased 8 1/2"x4 1/2" loaf pans*.
Cover with a cloth and let rest for 45 minutes in a warm room.
Bake in a preheated 350°F (180°C) oven for 35 to 45 minutes until dark golden brown. Use an internal thermometer, bread is done at 190°F (88°C).
Remove loaves from pan and cool on wire rack.
Resist temptation and allow bread to cool before slicing.
Notes
* I prefer 8 1/2"x4 1/2" loaf pans as they force the dough to bake over the pan sides giving slices the classic mushroom shape. You can use standard 9"x5" loaf pans as well. Store in sealed bag for up to three days on counter or seal and freeze for up to 6 months. The dough prefers a warm environment when rising. I will turn on the oven for a couple of minutes to warm it up just a little bit, then I turn it off and set the covered dough inside.
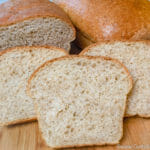
I have made many batches of this bread and have experimented with various levels of whole wheat flour. Here’s what it looked like when I used 100% whole wheat flour. As you can see, it’s still quite nice, but it is more dense and crumbly than when adding in all purpose flour. The gluten development is just not the same. Still pretty awesome!
If you’re an experimenter, go ahead and play with the ratios of all purpose to whole wheat flour. I’d love to hear how what your favorite combination is.
If you make a loaf or two, please take a photo and share it with me by tagging @getgettys on Instagram. Or leave a comment and let me know how it went.
Such soft bread! I usually make a sourdough sandwich loaf that I have perfected so I was wary to use a different recipe, but I needed something faster. This one is so good! I didn’t have eggs so I made a flax “egg” and I used coconut oil ( just because that’s what my other recipe uses), and I used my mixer just because I’ve rarely had good luck what I hand knead bread. When I pulled it out of the pans I was shocked at how fluffy it was. I think next time I’ll add a little more salt, but otherwise, this is my new recipe to make when I need something a little quicker than my usual bread.
Hi Sandy,
Thanks for your feedback! I have never tried using a food processor or any machine for this recipe. But I don’t see why it wouldn’t work. If you’re familiar with making yeast doughs with your food processor, go for it. Let us know how it goes.
I have not tried it with an egg replacement or leaving it out. The texture will change a little, but it should work. Another commenter mentioned they used a flax egg and it turne out great.
I made a loaf and a cob with is recipe, both dough did double in size, but when baked my loaf didn’t rise but my cob did, weird, I did knock air out of loaf after resting, was this a mistake? But both breads taste amazing!
Thanks so much for trying the recipe and for your kind words about the taste—I’m so glad you enjoyed it! It’s interesting to hear about the difference between the loaf (in a loaf pan) and the cob (freeform).
Knocking the air out of the loaf dough before shaping isn’t a mistake—it’s an important step to help create an even texture in the bread. I’m not sure why it wouldn’t rise – could it be it was knocked back too hard and lost too much of the gas needed for a good rise during baking. Was the loaf pan too big? Wish I could pin point the issue for you.
I made this recipe last week. I had enough dough to make the loaf of bread and two hamburger size rolls. They turned out perfect. I would also like to try rye flour, but it is heavier, I believe. So I want to be careful. I found this recipe because my sourdough starter was moldy..so had to start that over! Today is four days later and the texture of the bread is still great. Great toasted and for sandwiches. It stands up to moist fillings like tuna or egg salad. Thank you Getty!
Thanks for sharing your experience Olean, really appreciate it. Good luck with the rye flour, sounds like you’ve got the skills to experiment! Let us know how it goes.
Yeast is a tiny microorganism that causes bread to rise. It feasts on sugar in flour and produces dioxide which forms bubbles as bread dough is formed. You can buy different types and forms of yeast. While bakeries and experienced bakers often use compressed yeast cake, most home bakers buy yeast in granule format. The granules are tiny oblong tan colored granules that come in two main varieties. Active and Rapid-Rise.
Active Dry Yeast – requires a two step process. The first stage typically involves soaking the yeast in warm liquid until it softens and starts bubbling.
Rapid-Rise Yeast is also called – Instant yeast, rapid rise yeast and quick rise yeast. They’re called this because they can be mixed directly into the flour without pre-soaking. Hence, they are “quicker” to use.
In my recipes I typically use the rapid rise yeast. Although you can substitute with any other type of yeast by letting it proof or soak in the liquid from the recipe before adding.
Hope this helps, Peggy.
 I love fresh homemade bread – the smell, the taste and even the process of making it. There’s something so satisfying about kneading the dough, watching it rise and pulling fresh loaves out of the oven. Pure satisfaction!
 Another great thing about this recipe is that you can also use it to make dinner rolls or hamburger buns. You’re burgers and bunwiches deserve these buns!
 I love fresh homemade bread – the smell, the taste and even the process of making it. There’s something so satisfying about kneading the dough, watching it rise and pulling fresh loaves out of the oven. Pure satisfaction!
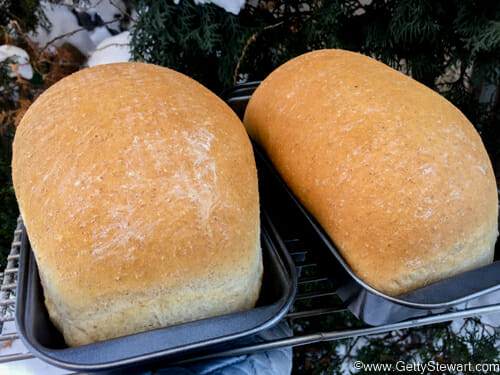 While I love a good sturdy whole grain, sourdough or rye bread, once in a while I also enjoy a lighter, softer style bread like this one. Unlike other whole wheat bread recipes, this one is quite light and not overly sweet as it’s sweetened with 2 tablespoons of sugar instead of molasses or honey. Even the most staunch white bread lover will enjoy this sandwich bread!
 Another great thing about this recipe is that you can also use it to make dinner rolls or hamburger buns. You’re burgers and bunwiches deserve these buns!
 If you’re an experimenter, go ahead and play with the ratios of all purpose to whole wheat flour. I’d love to hear how what your favorite combination is.
If you make a loaf or two, please take a photo and share it with me by tagging @getgettys on Instagram. Or leave a comment and let me know how it went.
If you’re an experimenter, go ahead and play with the ratios of all purpose to whole wheat flour. I’d love to hear how what your favorite combination is.
If you make a loaf or two, please take a photo and share it with me by tagging @getgettys on Instagram. Or leave a comment and let me know how it went.
Such soft bread! I usually make a sourdough sandwich loaf that I have perfected so I was wary to use a different recipe, but I needed something faster. This one is so good! I didn’t have eggs so I made a flax “egg” and I used coconut oil ( just because that’s what my other recipe uses), and I used my mixer just because I’ve rarely had good luck what I hand knead bread. When I pulled it out of the pans I was shocked at how fluffy it was. I think next time I’ll add a little more salt, but otherwise, this is my new recipe to make when I need something a little quicker than my usual bread.
Thanks for the thoughtful and helpful feedback. So glad you found a new favourite!
Turned out perfectly! I used avocado oil, very happy with the result. Thank you!
Thanks for the feedback Laura, very helpful for others. Glad you enjoy it.
Hi, love this recipe ! First made this by hand, but can you knead this dough in a food processor?
Hi Sandy,
Thanks for your feedback! I have never tried using a food processor or any machine for this recipe. But I don’t see why it wouldn’t work. If you’re familiar with making yeast doughs with your food processor, go for it. Let us know how it goes.
Getty
I’m trying it using my dough hook on my KitchenAid. I was careful not to knead it. I’ll let you know how it turns out!
I’m trying it using my dough hook on my KitchenAid. I was careful not to knead it too much. I’ll let you know how it turns out!
Hi Getty. Can this loaf be made successfully without egg?
I also want to know if can leave egg out or a substitute?
I have not tried it with an egg replacement or leaving it out. The texture will change a little, but it should work. Another commenter mentioned they used a flax egg and it turne out great.
I made a loaf and a cob with is recipe, both dough did double in size, but when baked my loaf didn’t rise but my cob did, weird, I did knock air out of loaf after resting, was this a mistake? But both breads taste amazing!
Thanks so much for trying the recipe and for your kind words about the taste—I’m so glad you enjoyed it! It’s interesting to hear about the difference between the loaf (in a loaf pan) and the cob (freeform).
Knocking the air out of the loaf dough before shaping isn’t a mistake—it’s an important step to help create an even texture in the bread. I’m not sure why it wouldn’t rise – could it be it was knocked back too hard and lost too much of the gas needed for a good rise during baking. Was the loaf pan too big? Wish I could pin point the issue for you.
Thank you so much for your reply, no I used a 9 x 5 loaf inch tin. I will try again. But the cob was lovely, didn’t last long 🙂
I made this recipe last week. I had enough dough to make the loaf of bread and two hamburger size rolls. They turned out perfect. I would also like to try rye flour, but it is heavier, I believe. So I want to be careful. I found this recipe because my sourdough starter was moldy..so had to start that over! Today is four days later and the texture of the bread is still great. Great toasted and for sandwiches. It stands up to moist fillings like tuna or egg salad. Thank you Getty!
Thanks for sharing your experience Olean, really appreciate it. Good luck with the rye flour, sounds like you’ve got the skills to experiment! Let us know how it goes.
I accidentally increased the water to 2 cups and LOVED the outcome!
Good to know! Maybe I’ll try that on purpose next time.
All the best,
Getty
Hi. What is instant yeast granuals and rapid rise yeast? And what is active dry yeast?
Hi Peggy,
Great question!
Yeast is a tiny microorganism that causes bread to rise. It feasts on sugar in flour and produces dioxide which forms bubbles as bread dough is formed. You can buy different types and forms of yeast. While bakeries and experienced bakers often use compressed yeast cake, most home bakers buy yeast in granule format. The granules are tiny oblong tan colored granules that come in two main varieties. Active and Rapid-Rise.
Active Dry Yeast – requires a two step process. The first stage typically involves soaking the yeast in warm liquid until it softens and starts bubbling.
Rapid-Rise Yeast is also called – Instant yeast, rapid rise yeast and quick rise yeast. They’re called this because they can be mixed directly into the flour without pre-soaking. Hence, they are “quicker” to use.
In my recipes I typically use the rapid rise yeast. Although you can substitute with any other type of yeast by letting it proof or soak in the liquid from the recipe before adding.
Hope this helps, Peggy.
All the best,
Getty