My Favorite Dehydrator – Excalibur 3900
What’s your favorite dehydrator? This is probably the number one question I’m asked in my dehydrating workshops and online discussions. While I’m not typically one to promote one brand over another, in the case of dehydrators, I love the Excalibur brand. It truly is the Rolls Royce of dehydrators.
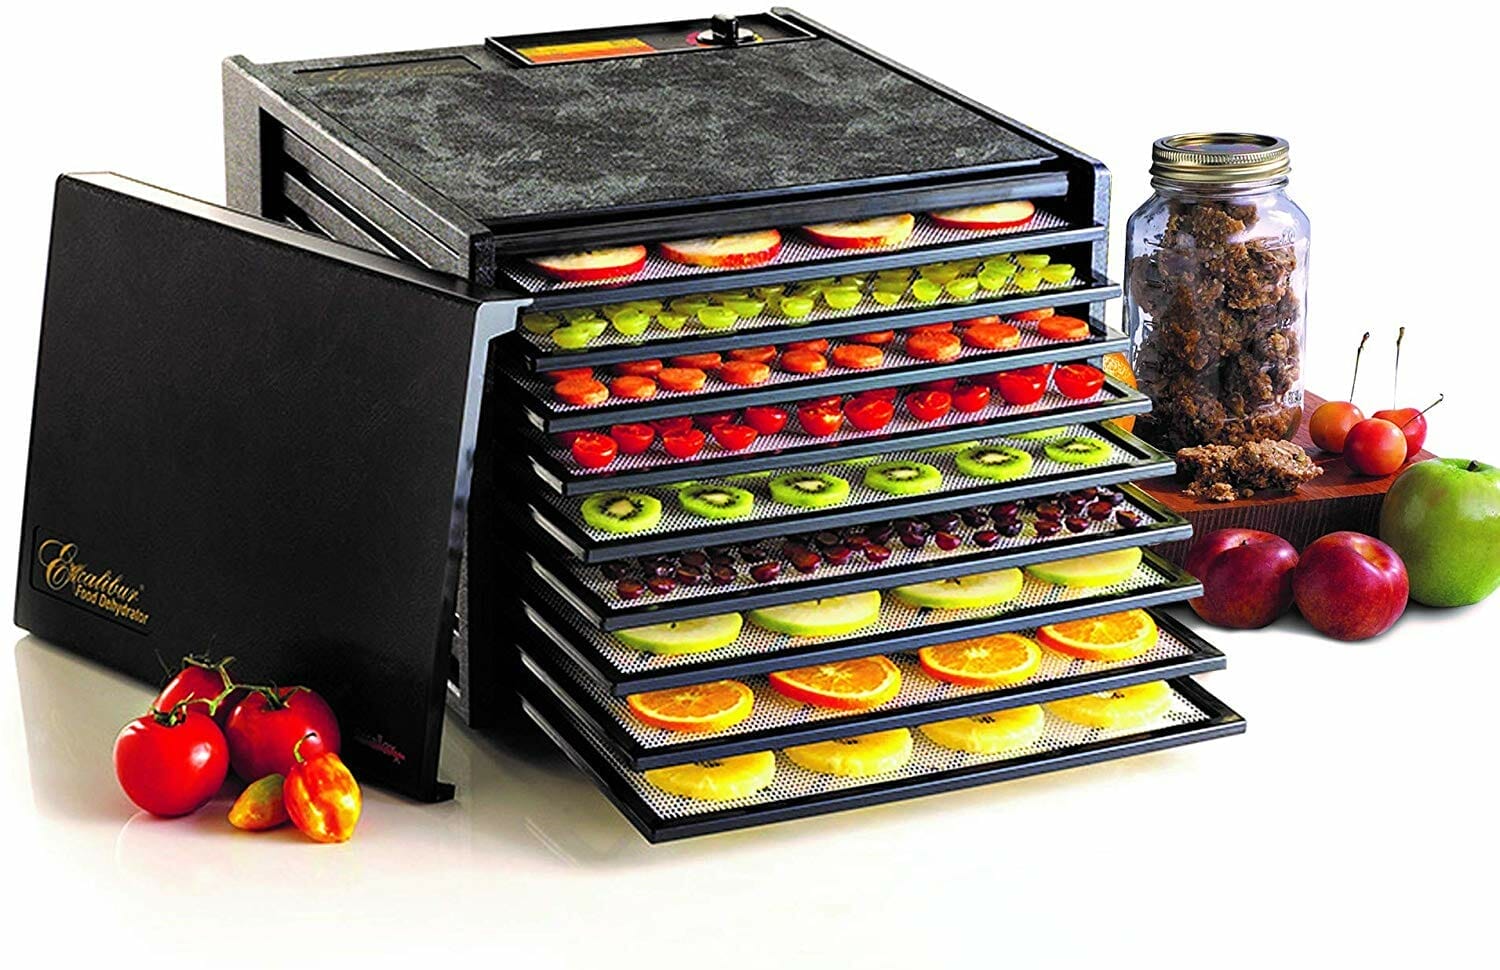
After ten years of using and loving my dehydrator and repeated questions about which dehydrator I use, I thought I’d share my thoughts and experiences with my Excalibur 3900 – nine trays or 15 square feet of dehydrating power (no timer). Here’s the Amazon link to the exact model I have.
Why Is the Excalibur My Favorite Dehydrator?
My first dehydrating experience was with a small round dehydrator. You really do get what you pay for! That little round dehydrator drove me insane! We enjoyed the end products, but uneven drying, slow drying, small surface space and having to rotate frames was too frustrating for me to enjoy the process.
I also tried dehydrating in my oven (see my oven dehydrated apple rings), and it worked, but small quantities and tying up the oven for 12-24 hours meant I didn’t dry food very often. I wanted to dry more food, without the frustration.
Finally, I bought the highly rated and expensive Excalibur. I’m not a big spender, so this was a big purchase for me, but it was totally worth it! Ten years later, after loads of fruits, herbs, veggies, fruit leather, snack bars, some meat and numerous camping meals, my dehydrator still works as good as ever.

There are cheaper dehydrators and they will eventually dry your food, but not as easily and conveniently as an Excalibur. Here’s what I love about the Excalibur.
- The fan and airflow. With the Excalibur the fan is at the back of the unit which blows air horizontally across all the trays equally. This helps ensure even drying. This means you don’t have to rotate trays. Say for example you’re drying fruit leather. With the Excalibur you set the temperature and check it at 8 hours to check for doneness. With a less robust dehydrator, you’ll check your dehydrator at 4 hours to rotate the trays. You may do that again at 6 hours. If you forget – you’ll get crispy, over-dried fruit leather on the tray closest to the fan and under-dried fruit leather with wet spots on another tray.
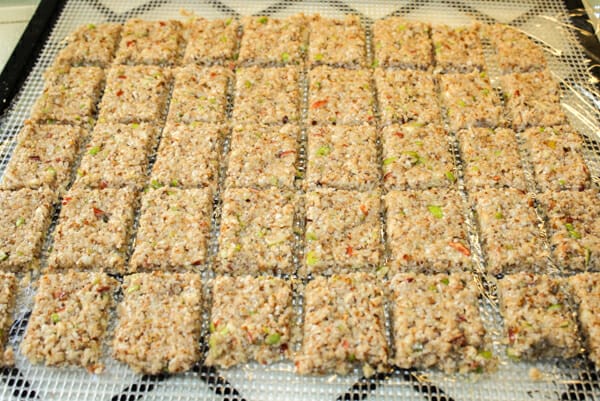
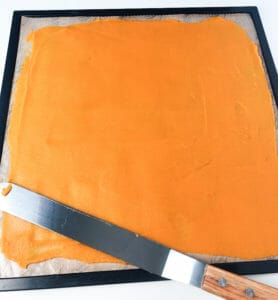
- Square trays. My biggest pet peeve with the round trays was trying to evenly spread soups, fruit leather mixes, bark mixes, purees etc around the center hole. Such a pain! I never tried making crackers or granola bars, because of the time it would take to lay them out on a round tray. With the square trays, I pour on the ingredients, smooth it out with an offset spatula or score it if I’m making bars. No fuss. See the photo of the scored bars below, way less convenient when there’s a hole in the center of the tray that you have to work around.
3. Temperature Control. Temperature control should be a standard feature of all dehydrators, but it’s not. Whatever model you buy – make sure it has a temperature control! Different foods dry at different temperatures for both quality and food safety reasons. For example, herbs will stay fragrant longer when you dry them at a low 95°F but to safely dry meat, jerky or mixed foods (soup, chili) you want to set the temperature at 145-165°F. You want to be able to control that.
4. Robust, Solid Parts. I have used my dehydrator A LOT in the last ten years and it still looks and operates like new. I have taken it to endless number of workshops in kitchens, schools and community clubs around the province. The trays have been used and washed repeatedly and there isn’t a single crack, chip or ding in the plastic. The Excalibur 3900 comes with a 10 year warranty. Not a lot of dehydrators can say that.
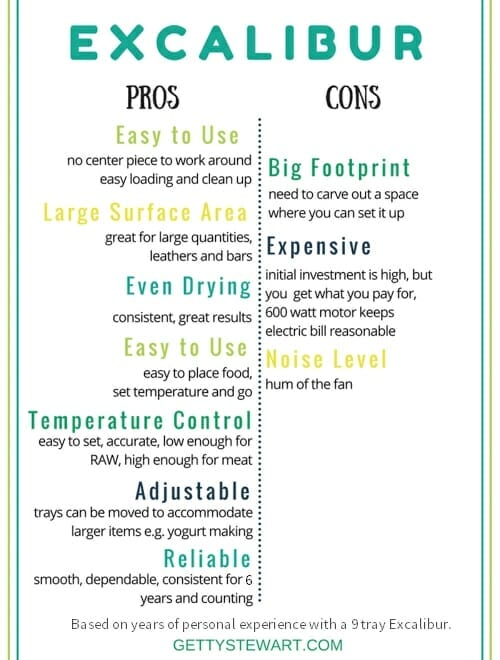
My pros and cons in a quick list.
Should You Buy A High End Dehydrator?
YES – IF…
- You know you’re serious about dehydrating food. Consider borrowing one from a friend if you’re not sure.
- You are a gardener or hunter and eager to preserve your food.
- You do a lot of outdoorsy activities and want to make lightweight, safe trail food.
- You’re interested in storing a lot of food safely for a long time.
- You’re a RAW foodie and like being able to set drying temperatures low.
NO – IF…
- You think you’ll only use it once or twice a year.
- You don’t have a space where you can set it up so it’s convenient to use. It’s too big to haul around and I bet you’d forget about it. The good news is you can set it up in the garage, basement or gazebo – it doesn’t have to be in your kitchen.
That’s my thoughts on the Excalibur dehydrator. Here are the specifications of my machine.
- 9-large trays, 15″ x 15″ each
- BPA free plastic mesh screens
- Adjustable Thermostat 105◦F to 165◦F (40°C to 65°C) (low enough for Raw Food, high enough for meat)
- 7-inch fan, 600 watts
- Voltage: 110-120V
- Unit Dimensions:12-1/2 H x 17 W x 19 D (inches)
- Shipping Weight: 22 lbs
- Made in USA
Here’s my model.
Other Models to Consider
Something smaller – consider the 4 tray Excalibur model. Another brand that is much more affordable and often recommended in a dehydrating chat group I belong to is the Nesco brand (I’ve never used one, so can’t say anything about them). Just be sure to get the temperature control.
Something stainless steel – if you really don’t like the idea of plastic touching food, Excalibur offers a 9 tray model or a commercial sized 10 tray model in stainless steel. Or you can buy stainless steel trays to replace the plastic ones on a different model.
Optional Additions – Not Necessary
I wouldn’t pay extra for the following:
Timer: Dehydrating times are very subjective and vary with every single batch. There are so many variables that determine how long it will take to dry a particular food at a particular time. Even if you had the same food, cut or poured to the exact same thickness drying times would vary due to humidity levels. In other words, you can’t just set a timer and assume your food will be done at a certain time. It just doesn’t work that way. A timer will give you a rough estimate at best. If the timer option comes for free, okay but personally, I wouldn’t spend extra money on a timer. If there ever is a time when you need a timer – you can always use the timer from you Christmas lights, it’ll do the same thing!
Viewing Window or Glass Door: I seriously would not pay extra for this. You can’t just look into a window and tell if your food is dry. You need to look carefully and touch the food to really know what’s going on. Besides, who would want to see food dry for 8 hours or clean glass?
Useful Accessories
ParaFlex Sheets – these are the liners that go on top of the mesh on your trays for liquid or small items. They’re great and fit perfectly for the Excalibur. I only have 5 official Excalibur ParaFlex Sheets and for the most part that’s all I need. In the rare occasion that I need to cover more trays, I use plastic wrap or parchment paper.
You can also use silicone liners like Silpat, but that’s even more expensive. I’ve never tried thick silicone liners like that, so not sure if they add to the drying time or not. I have used this Cookina liner and find it works very much like the ParaFlex Sheet. The roll includes 2 sheets that you can cut to size.
Offset Spatula – An offset spatula is great for smoothing out fruit leathers and any other kind of liquid/saucy thing. I have one with a long blade so I can do one pass over the entire tray.
Slicing Machine – Even slicing is key for even drying. If you have great knife skills – you’re set. I like using my handy dandy apple peeling machine and mandolin.
There, now you know my thoughts and opinions on dehydrators. I do not often endorse products or recommend certain items for purchase, but I really like this product. I do not get paid by Excalibur.
I’ve provided Amazon links for you to explore and be able to see the exact models I’m talking about. As an Amazon affiliate I earn from qualifying purchases.
Once you get your dehydrator, come back and check out all the great dehydrating recipes!
Sign up to get articles by Getty delivered to your inbox. You’ll get recipes, practical tips and great food information like this. Getty is a Professional Home Economist, speaker and writer putting good food on tables and agendas. She is the author of Manitoba’s best-selling Prairie Fruit Cookbook, Founder of Fruit Share, a mom and veggie gardener.
Why did you choose the “no timer” dehydrator as opposed to one of the options with a timer?
Hi Heather,
Excellent question.
I find that it is super difficult if not impossible to determine a precise drying time for food because conditions are never the same. For example when I dry apples, sometimes they take as little as 6 hours, sometimes they take 8 or even 10 hours. It depends on the humidity, the variety of apple, how many trays, etc. For that reason, even if I had a timer on my dehydrator I’d be guessing at what time to set. I also work out of my house, so it’s easy enough for me to check on food in the dehydrator throughout the day.
Having said that, a timer would be handy if it’s difficult for you to check on your food throughout the day. You could set a timer for the shortest time period and then add more time as needed when you get to check the food. For example, when doing apples, set the timer for 6 hours then when you get home from work, check them to see if they’re done or not. That way, you know that you won’t over dry your food.
What are your thoughts on a timer?
Hello again,
I didn’t have an opinion on a timer before I read your post. Your reasons make perfect sense. I work out of the house, but my husband is home so we wouldn’t need a timer either. And you’re right about having to check. I’m sure there are many variables involved so you’ve probably gotta get the feel of it to get it right!
On another point, I was looking at your dried soup recipes. I was thinking about who I could give them to as gifts, and then it occurred to me that they would probably like to be able to use the dried soup mixes in the crockpot. Have you ever experimented with that?
Hi Heather,
Maybe if I were used to using a timer, I’d never want to be without! If anyone else has experience with a timer, please let us know your thoughts.
As for the soup, I have not tried making them in the crockpot. I think the quinoa and red lentil soup might be too quick cooking for it to work well in the crockpot. That’s actually what I love about that particular recipe, it cooks up very quickly. Some of my other mixes with just beans and veggies might work. If there are small pasta shells in a soup mix, I’d be concerned that it would get overcooked and may turn too mushy? Worth a try.