8 Tips for the Best Deviled Eggs Ever
Deviled eggs – let’s put these classics back on the appetizer tray! These high protein snacks have been around for ages and are making a big come back because they’re so delicious, easy to make and you can dress ’em up in many different ways.

More egg recipes: Egg Salad with Fresh Herbs, Shakshuka Eggs, Apple Cranberry French Toast Bake, How to Make Smooth Easy Peel Eggs
Before you start boiling, slicing and filling your eggs, here are a few tips that will ensure you enjoy making them as much as you enjoy eating them.
8 Do’s and Don’ts for the Best Deviled Eggs
1. DO use old eggs.
I know that sounds odd, but fresh eggs are harder to peel. Egg shells are semi-permeable, which means over time more and more air will penetrate the egg making the air sac (you know that little air pocket) bigger over time. The acidity of eggs also decreases over time making the egg white loosen its grip on the shell. As a result, eggs at least 7-10 days old will be much easier to peel.
Did you know raw eggs stored in a refrigerator can last up to 4 or 5 weeks?
2. DON’T hard boil your eggs to death.
That’s right, don’t boil your eggs too long or hard. Extended high heat will create that dark green or grey ring around the yolks – and while you might be able to hide it in an egg salad – that ring of green doesn’t look very appealing in deviled eggs. Use this method to make perfect boiled eggs that are easy to peel.
3. DO make a couple of extra eggs.
Play it safe and add an extra egg or two to the pot. With all that peeling, cutting, scooping and refilling there’s a chance something might slip, rip or drip. It’s good to have a spare hard cooked egg – and if all goes well, you have a lovely egg to nom on.
4. DON’T use a serrated knife.
A serrated knife will leave marks on your egg halves. Use a large chef’s knife to halve your egg in one even slice.
5. DO use a sieve to mash the egg yolks.
The goal is to create a smooth, light and airy filling. By using the back of a spoon or fork to mash your egg yolks you run the risk of having small lumps or overworking the yolks to a dry paste. Instead push yolks through a fine mesh sieve. You’ll get smooth, even egg yolks that will stay light and airy when mixed with other ingredients.

6. DON’T limit yourself to mayo
While mayonnaise may have been the ingredient of choice in the 60s and 70s, there are so many options for creating unique, tasty and healthy fillings. The recipe below uses low fat Greek yogurt, but you could also try mixing in guacamole, hummus, pesto, sweet potato, curry paste, cottage cheese, horseradish, etc. Of course, you can also try adding in a bit of texture with olives, peppers, pickles, anchovies, etc.
Just make sure whatever you’re adding won’t make the filling too runny. You want that filling to hold its shape in the egg.
7. DON’T fill your eggs with a spoon
Using a spoon to fill your eggs will be messy, frustrating and time consuming. Save yourself the trouble and use a piping bag or a sandwich baggie with a small cut in one corner.
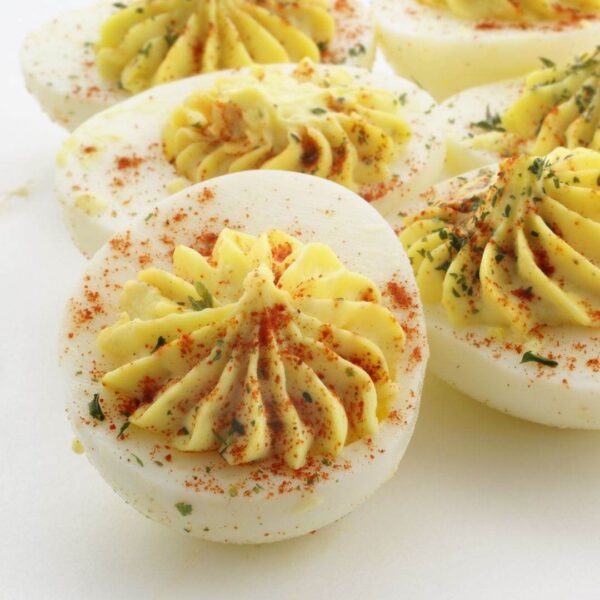
8. DO have fun with presentation
Decorating and displaying your deviled eggs is the best part! Consider displaying them on a bed of lettuce or dried lentils or beans. Use raw veggies to add additional color and create patterns. Decorate the top of the filling with a classic sprinkle of paprika, slices of bacon, green onions, hot peppers, olives, tomatoes, cheese or whatever the occasion calls for.
Of course, if none of these tips work and your feeling beyond frustrated – take a detour and make an awesome egg salad for the party. Serve in a pretty bowl with homemade pita chips and nobody will be the wiser.

The Best Lightened Up Deviled Eggs
Ingredients
- 6 large hard cooked eggs
- 1/4 cup low fat Greek yogurt
- 1/2 Tbsp Dijon mustard
- 1 tsp hot pepper sauce or Worcestershire your choice
- pinch salt and pepper
- 1 green onion or parsley chopped
- 1 tsp paprika
Instructions
- Peel hard boiled eggs.
- Use a large chef knife to slice eggs in half lengthwise. Use one long stroke to cleanly cut through the egg.
- Use a small spoon to scoop out the egg yolks. Lay the egg whites on a large tray or cutting board.
- Put egg yolks into a fine mesh sieve and push into a bowl with a rubber spatula or the back of a spoon. Mix in yogurt, mustard, hot sauce or Worcestershire, salt and pepper.
- Taste filling and adjust to your taste preference. If filling is too thick, add 1 tablespoon of yogurt to thin out.
- Scoop filling into a piping bag or into a small plastic bag. If using plastic bag, snip a small hole in one of the corners. Squeeze the filling through the opening into the eggs. The filling should come above the level of the egg white in a little mound.
- Ideally, let filled eggs rest in fridge for 20 minutes.
- Arrange eggs on a platter and sprinkle eggs (and a bit of the platter) with paprika and green onions or parsley.
- Devilled eggs can be stored in fridge for 3-4 days.
Notes
Nutrition Facts (per serving)
More Egg Favorites you’ll LOVE

Cook with the seasons, effortlessly! I’m Getty, a food educator and Professional Home Economist, helping you select, store, and serve seasonal ingredients in delicious, simple, everyday meals. Sign up for seasonal tips and recipes delivered straight to your inbox, and dive deeper with my books, guides, or YouTube content.
When you put on the lid and turn off the heat while cooking the eggs, do you remove the pan from the hot burner?
Hi Ann,
Good question. The goal is to stop the water and eggs from boiling, if your burner stays so hot that it doesn’t stop the boiling water right away, yes remove the pan. Otherwise, it’s okay to leave on the burner. I use a gas range so when I turn the burner off, the water stops boiling right away so I leave the pan on the stove. It may be different with some electric stove tops.
Hope this helps,
Getty