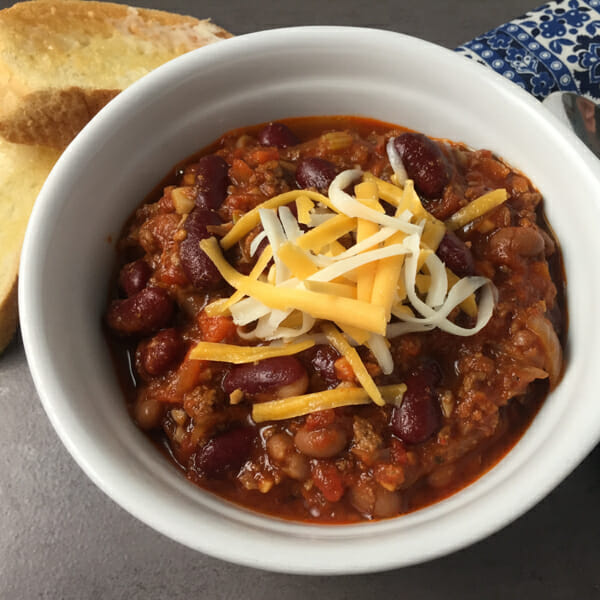
Classic Beef and Bean Chili – Chili Con Carne
This is our favorite beef and bean chili. If you haven’t found a family favorite chili recipe, your search is over because you’re going to love this chili! This is some seriously good chili con carne – in case you’re wondering “con carne” means with meat.
Also Read: Pork & Green Bean Chili, Butternut Squash Vegetarian Chili
We’re happy to share our family’s favourite chili recipe while also sharing answering some questions that may arise as you’re making the chili. For example, do you know why you should be heating the pan BEFORE adding oil or why you even need oil at all if you’re using meat that already has fat in it?
Get answers to these commonly asked questions after the recipe.
- Why Heat the Pan Before Adding Anything?
- Why Heat the Oil?
- Why Use Oil at All?
- When Should I Add Seasoning?
- When Should I Add the Beans?
- What’s the Best Way to Freeze Chili?
The beauty of chili is that it is completely customizable. You can add and subtract ingredients to make it just the way you like it. If you want more heat, different type of beans, different type of meat, more or less veggies, corn, etc. no problem! Go ahead, do whatever suits you and your family.
Our version of chili includes a lot of veggies. Not only do they add flavour and nutrients but the added bulk means more chili to go around for less money than using all beef. To accommodate all the taste buds around our table, we go easy on the hot stuff in this recipe and serve hot sauce, chili flakes or homemade cayenne pepper on the side.

Recipe for Classic Beef and Bean Chili

Classic Beef ‘n Bean Chili
Ingredients
- 1 Tbsp canola oil
- 1 lb lean ground beef
- 1 onion diced
- 2 celery stalks diced
- 1 carrot diced or shredded
- 3 cloves garlic minced
- 1/2 lb mushrooms diced (10-12 mushrooms)
- 2 Tbsp chili powder
- 1/2 Tbsp cumin
- 1 tsp dried oregano
- 1 tsp paprika
- 1 tsp cayenne pepper
- 1 can 6 oz tomato paste
- 1 cup beef stock
- 1 can 28 oz diced tomatoes
- 1/2 Tbsp Worcestershire Sauce
- 1 can 19 oz red kidney beans
- 1 can 14 oz navy beans or baked beans
- ½ Tbsp brown sugar optional
- salt and pepper to taste
Instructions
- Heat pot or dutch oven over medium high heat for 1 minute.
- Add oil to pan and heat for 1 minute.
- Add ground beef but don’t stir. Sear one side until golden brown, flip and sear other side. Break up into pieces and cook until no pink remains.
- Drain off liquid if needed.
- Add onions, celery and carrots; cook until softened and onions are translucent, about 3-4 minutes.
- Add garlic and mushrooms; cook another 2-3 minutes.
- Add chili powder, cumin, oregano, paprika and cayenne pepper; cook until fragrant, about 1 minute.
- Add tomato paste and mix well.
- Add beef stock, diced tomatoes and Worcestershire sauce. Mix well and gently simmer on medium to low heat for 45 minutes, stirring occasionally.
- Add beans; cook for another 15 minutes. OPTION: if you prefer really soft, tender beans add them with the tomatoes.
- Taste and adjust seasoning as desired. Add brown sugar if chili is too acidic.
- Serve with shredded cheese on top.
Notes
Nutrition Facts (per serving)

Common Questions When Making Beef and Bean Chili
Why heat the pan before adding the oil?
Cast iron and stainless steel pans will produce better results when heated first. The only type of pans you should not heat without anything in them are non-stick coated pans. To check if your cast iron or stainless steel pan is hot enough, flick a few drops of water onto the surface—if they sizzle and dance around, it’s ready. For stainless steel, a single bead of water that glides smoothly across the pan means it’s at the ideal cooking temperature. It often takes longer than you think to get it hot enough!
Preheating the pan will…
- help prevent food from sticking
- allow for nice browning
Why heat the oil first?
To get even, consistent browning and to prevent oil from simply soaking into food, recipes like this often recommend heating the oil first. You’ll know the oil is hot when you see it shimmer or when a couple of drops of water in the oil sizzle. If you see wisps of smoke, your oil is too hot, allow it to cool a little before adding food.
Preheating the oil will…
- prevent food from sticking to the pan
- spread the oil over the pan more easily which means you need less oil
- provide more even browning
- prevent a greasy taste
Do you need to use oil at all?
It depends. Adding oil to the pan is optional since the fat in the meat will melt and coat the pan – unless you’re using very lean meat. However, it takes a minute or so for fat from meat to coat the pan, so a small coating of oil on the pan is often recommended.
While optional, using oil with ground meat will…
- help prevent sticking
- brown meat more quickly and evenly
When should I add the seasoning?
By roasting your spices you’ll bring out their full aroma and flavour making your dish taste richer and fuller. But be warned, it doesn’t take very long and over roasting will lead spices to burn and taste bitter. If using ground herbs and spices, it will take less than a minute. When you add spices with liquid ingredients, you won’t get their full effect and you may need more spice to make up the difference.
Add fresh, tender herbs like fresh parsley, basil, cilantro at the very end of cooking to keep them vibrant.
When should I add the beans?
Canned beans are fully cooked and really only need to be heated through. The best time to add canned beans to chili is during the last 15–20 minutes of simmering. This gives them time to heat through and absorb flavour without overcooking or becoming mushy. Be sure to drain and rinse them first to reduce excess sodium and improve texture.
That said, for convenience, it’s also okay to add them along with the tomatoes. In fact, some people—like my daughter—prefer their beans so soft and tender they blend right into the chili. So go with what works for you!
What’s the best way to freeze beef and bean chili?
We love, love, love chili left-overs. When chili has been simmered, cooled and reheated the flavours get to fully develop and penetrate into every morsel. Chili leftovers are the best.
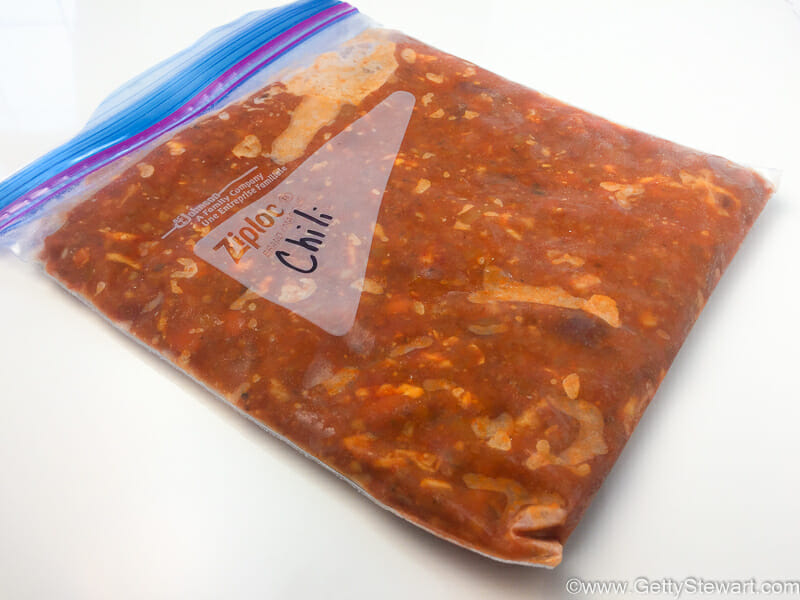
However, there are times when you want to freeze some chili for another time. Chili freezes very well and will last for 6 months. Here are some tips to maximize quality:
- Cool chili completely before freezing. This helps prevent condensation which turn into ice crystals that lead to poor quality frozen food.
- Pour cold chili into freezer container or freezer bag. If using rigid containers, leave an inch of space to allow for expansion. If using freezer bags, squeeze out most of the air and lay flat on a baking sheet. Freeze bag on the baking sheet so it freezes in a flat, room-saving shape.
- Freeze in convenient portion sizes for how you plan to serve the chili. Single serve sizes are great for quick lunches while large containers are great for family dinners.
- Label your container so you’ll remember what it is and if you have family members just learning to cook, include reheating instructions for them.
- Use within 6 months.
To use frozen chili…
- Thaw in fridge overnight or use microwave.
- In a pot or in a microwave, heat to desired temperature and enjoy!
Well, there you have it – all our beef and bean chili making secrets! I hope they serve you well.
Looking for a beef alternative – try these:
Butternut Squash and Bean Chili – Vegetarian Option
Now, it’s your turn to share a little about your family chili recipe. What’s your family’s favorite type of chili? Do you like to have chili with or without corn? What kind of beans do you use? Or, are you a no bean in chili kind of family? Have you ever tried adding dark chocolate, coffee or beer in your chili recipe? Do you have a special technique or secret ingredient that makes your chili irresistible?
Getty Stewart is an engaging speaker and writer providing tasty recipes, time-saving tips, and helpful kitchen ideas to make home cooking easy and enjoyable. She is a Professional Home Economist, author of Manitoba’s best-selling Prairie Fruit Cookbook, Founder of Fruit Share, mom and veggie gardener.
