How to Can Applesauce – Hot Water Bath Canning
Learn how to can applesauce using the hot water bath canning method. Just follow these seven simple steps and you’ll have tasty homemade, shelf stable applesauce to enjoy all year long.
Also Read: How to Make Applesauce, Pressure Canning or Hot Water Bath Canning, Steps to Hot Water Bath Canning
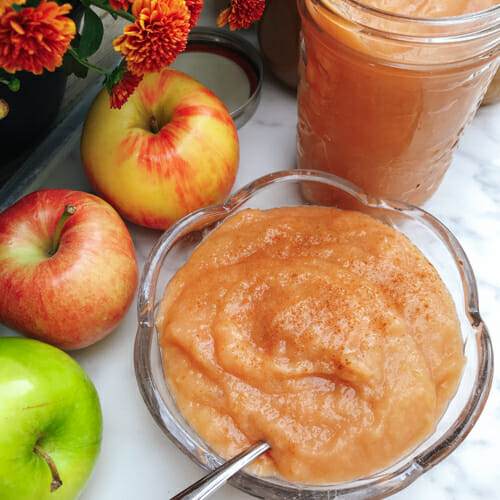
Homemade applesauce – is the best! You are definitely in the driver’s seat when you can your own applesauce. You get to decide what kind of apple(s), how much if any sweetener you add, what kind of seasonings (if any) and how smooth or chunky your sauce is. And, while it does take a little time, all the steps are super easy – even if you’ve never canned before – you CAN do this!
Hot Water Bath or Pressure Canning for Applesauce?
Apples are considered a high acid food, so it is safe to use the hot water bath method of canning outlined below.
If you have the equipment and want a slightly faster way to process apples you can also pressure can applesauce. It’s actually one of the few foods you can choose to can using either method. To Pressure Can Applesauce process follow the steps as outlined by the National Center for Home Food Preservation. Other than saving 7-10 minutes of processing time and using less water, there is no advantage to pressure canning versus hot water bath canning your applesauce.
What size of Jars?
When canning applesauce you can select different sized jars. Select small, 1/2 cup jars if you enjoy using applesauce as a side for roasts, half pint jars (1 cup/250 ml) for dessert or baking recipes and quart size jars (4 cups/1 litre) for serving a family a couple of times. Choose a size that works best for how you use applesauce and then double check how long you need to process your jars in the hot water bath. Now that my kids don’t pack applesauce for school lunches anymore, I find pint jars (2 cup/500ml) are perfect for us.
If you choose a jar size that isn’t listed in the processing instructions, process for the time indicated for the next biggest jar size. For example if you choose a half pint jar and the only processing times given are for 1/4 pint or pint jars – use the time indicated for the pint jar.
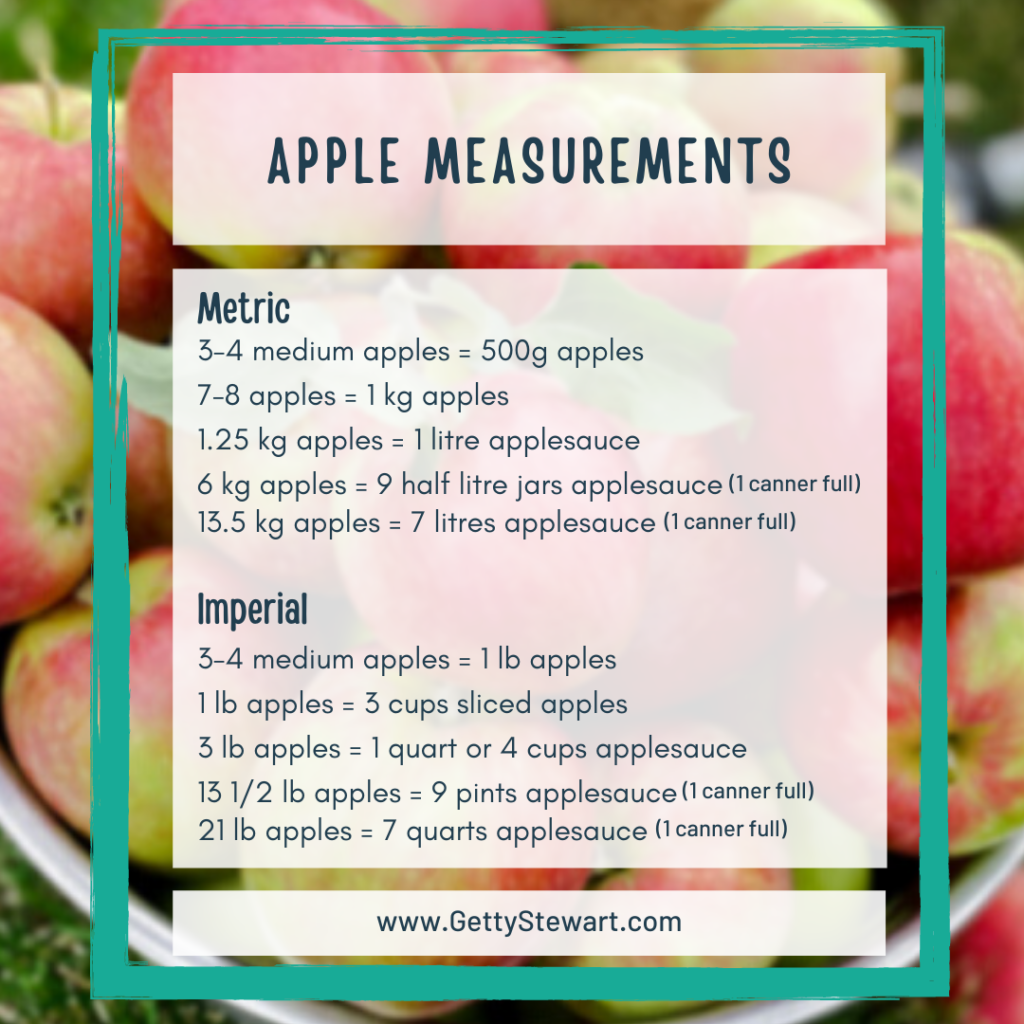
How Many Apples Do I Need?
You can process as many or as few jars as you’d like; the only limiting factor is the size of your canning pot. You can use a big soup pot that will hold 5-7 half pint jars (1 cup) or you can use a big canner that can hold 7 quart jars (4 cup jars) or 9 pint jars (2 cup jars). Here’s a rough guide to help you decide how many apples to get.
Steps to Hot Water Bath Can Applesauce
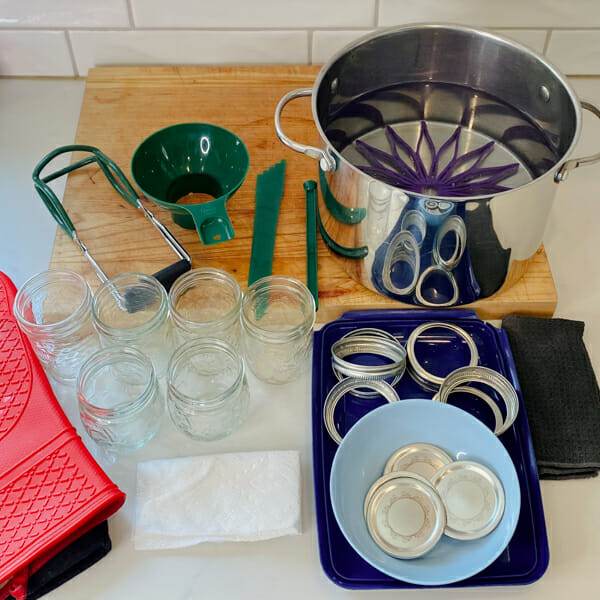
1.Prep Jars, Lids & Canner
Prepare as many jars and lids as needed for amount of applesauce you have. I usually prepare one or two extra jars, just in case. This means washing, checking for cracks and getting them hot. Because the applesauce will be heat processed for more than 10 minutes, you don’t need to sterilize them.
Place rack, trivet or towel in bottom of a canner or pot. Add the clean jars, standing upright. Add enough water to fill and cover jars with water. Heat water to keep jars hot (just below boiling – about 180°F/82°C). It’s important to keep the jars hot so that you’re putting hot applesauce into hot jars. This avoids glass jars from cracking due to temperature shock.
Lids do not need to be boiled or even heated, just wash and have ready. Read my article on the Latest in Home Canning in the Manitoba Cooperator.
2.Heat Applesauce
Ensure your applesauce is boiling hot when ready to fill jars.
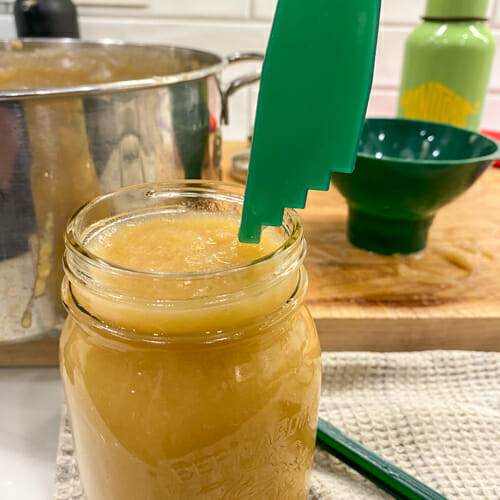
3. Fill Jars
Pour hot apple sauce into hot jars leaving a ½ inch (2 cm) space from the top rim of the jar – a funnel helps control the mess!
Use a plastic utensil to remove any air bubbles. Adjust headspace with more applesauce if needed to keep the 1/2 inch (2 cm) space between the applesauce and the top rim of the jar.
4. Wipe Rim & Seal
Wipe rim of jar with clean cloth and place lid on top. Place screw band on top and tighten finger tight. It’s important not to tighten beyond finger tight so that air in the jar can escape.

5. Process Jars
Place jars in the canner. Ensure the jars are covered with at least one inch (2.5 cm) of water. Bring the water to a hard rolling boil (212°F/100°C). This can take a while. When the water boils, set a timer for the specified processing time and continue to boil until time is up. The processing times for applesauce according to the National Center for Home Food Preservation at altitudes of 1,000ft are:
Pints (2 cup/500 ml jars) – 15 minutes + altitude adjustment if over 1,000ft
Quarts (4 cup/1 L jars) – 20 minutes + altitude adjustment if over 1,000 ft
Altitude Adjustment
- At 1,001 to 3,000 feet above sea level, add 5 minutes to processing time.
- At 3,001 to 6,000 feet above sea level, add 10 minutes to processing time.
- At 6,001 to 8,000 feet above sea level, add 15 minutes to processing time.
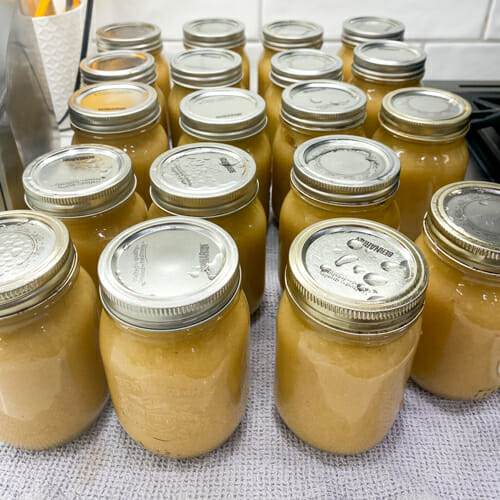
6. Cool & Check
Turn off heat, remove canner lid cautiously and wait 5 minutes. Remove jars from water and place in draft free location on a clean
towel. Do not tip, tighten bands, dry water off the top, or do anything else to the jars; just leave undisturbed for 24 hours. You’ll hear
popping as the jars form an airtight vacuum seal.
Check all seals after 24 hours of cooling. If the lid is concave and remains down when pressed, it is sealed. If the lids are loose or the centre pops up and down, they are not properly sealed. These jars can be reprocessed within 24 hours or stored in the fridge and used within 3 weeks.
It is common to see air bubbles develop in applesauce after processing – even if you debubbled really well! This happens with applesauce and does not pose any concerns.
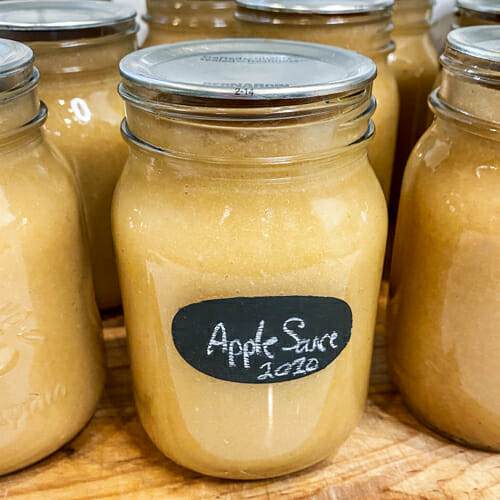
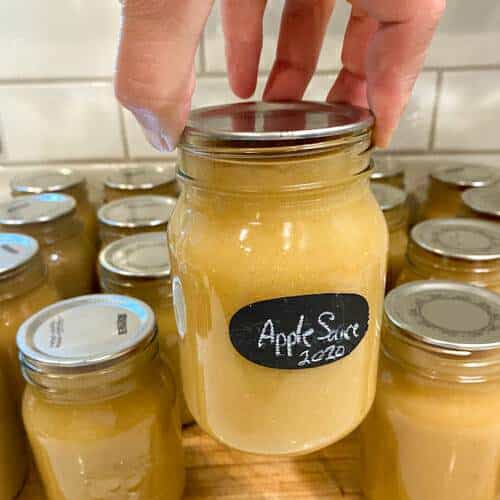
7. Label & Store
Label, date and store jars without the outer ring for up to a year for best quality. Removing the outer ring will prevent rust and provide an instant indicator if there are any faulty seals.
Need Ideas for Using Applesauce?
Check out my article on making applesauce that lists some great ways to use it all up.
Need More Apple Recipes?
If you have an apple tree or just got a bounty of apples – you need recipes and preserving ideas. That’s why I wrote the Apple e-Cookbook. No need for endless searching on the web. Get trusted, tried recipes, tips and preserves in one spot. Over 60 sweet and savoury recipes and preserves for you to choose from. Take a look at the table of contents and see for yourself.

I hope you found these steps helpful, if you have any questions, please reach out to me on Instagram @getgettys or Facebook @GettyStewart.HomeEconomist.
Cook with the seasons, effortlessly! I’m Getty, a food educator and Professional Home Economist, helping you select, store, and serve seasonal ingredients in delicious, simple, everyday meals. Sign up for seasonal tips and recipes delivered straight to your inbox, and dive deeper with my books, guides, or YouTube content.
Regular players value smooth access, and the lottery 7 game login option ensures users can return to the platform easily and continue their gaming experience anytime.
I tried your applesauce canning method and it turned out amazing! The step-by-step instructions were super helpful, especially the tips on acidity levels. Can’t wait to enjoy my homemade applesauce this winter! Thank you for sharing your expertise!
I tried your hot water bath canning method for applesauce, and it turned out amazing! The step-by-step instructions were super easy to follow. Thanks for sharing such helpful tips! I’ll definitely be making this every fall!
I just tried your hot water bath canning method for applesauce, and it turned out amazing! Your step-by-step instructions were super helpful, and I loved the tips on adjusting sweetness. Can’t wait to make more batches! Thank you for sharing!
I loved this tutorial on canning applesauce! Your step-by-step instructions made it so easy to follow, and I appreciated the tips on choosing the right apples. Can’t wait to try this out with the fall harvest! Thanks for sharing!
This post was super helpful! I’ve always wanted to try canning applesauce, and your step-by-step instructions made it seem so doable. I love that you included tips for troubleshooting common issues too. Can’t wait to give it a try and enjoy that homemade goodness! Thanks for sharing!
I just tried your applesauce canning method, and it turned out perfect! The step-by-step instructions were super easy to follow. I can’t wait to enjoy this during the winter months. Thank you for sharing such a useful and delicious recipe!
I just tried your hot water bath canning method for applesauce, and it turned out amazing! The step-by-step instructions were super easy to follow, and I loved the tips you included about spices. Can’t wait to enjoy this all winter long! Thank you for sharing!
I ran across this article when searching for info. I couldn’t find my canning rack so I initially used the trick where you twist tie old canning rings together.
Thanks for this info! I used this pretty much verbatim. I appreciate the simple instructions.
You’re welcome! Tying the canning rings together works well, the silicone trivet or dish cloth is just easier.