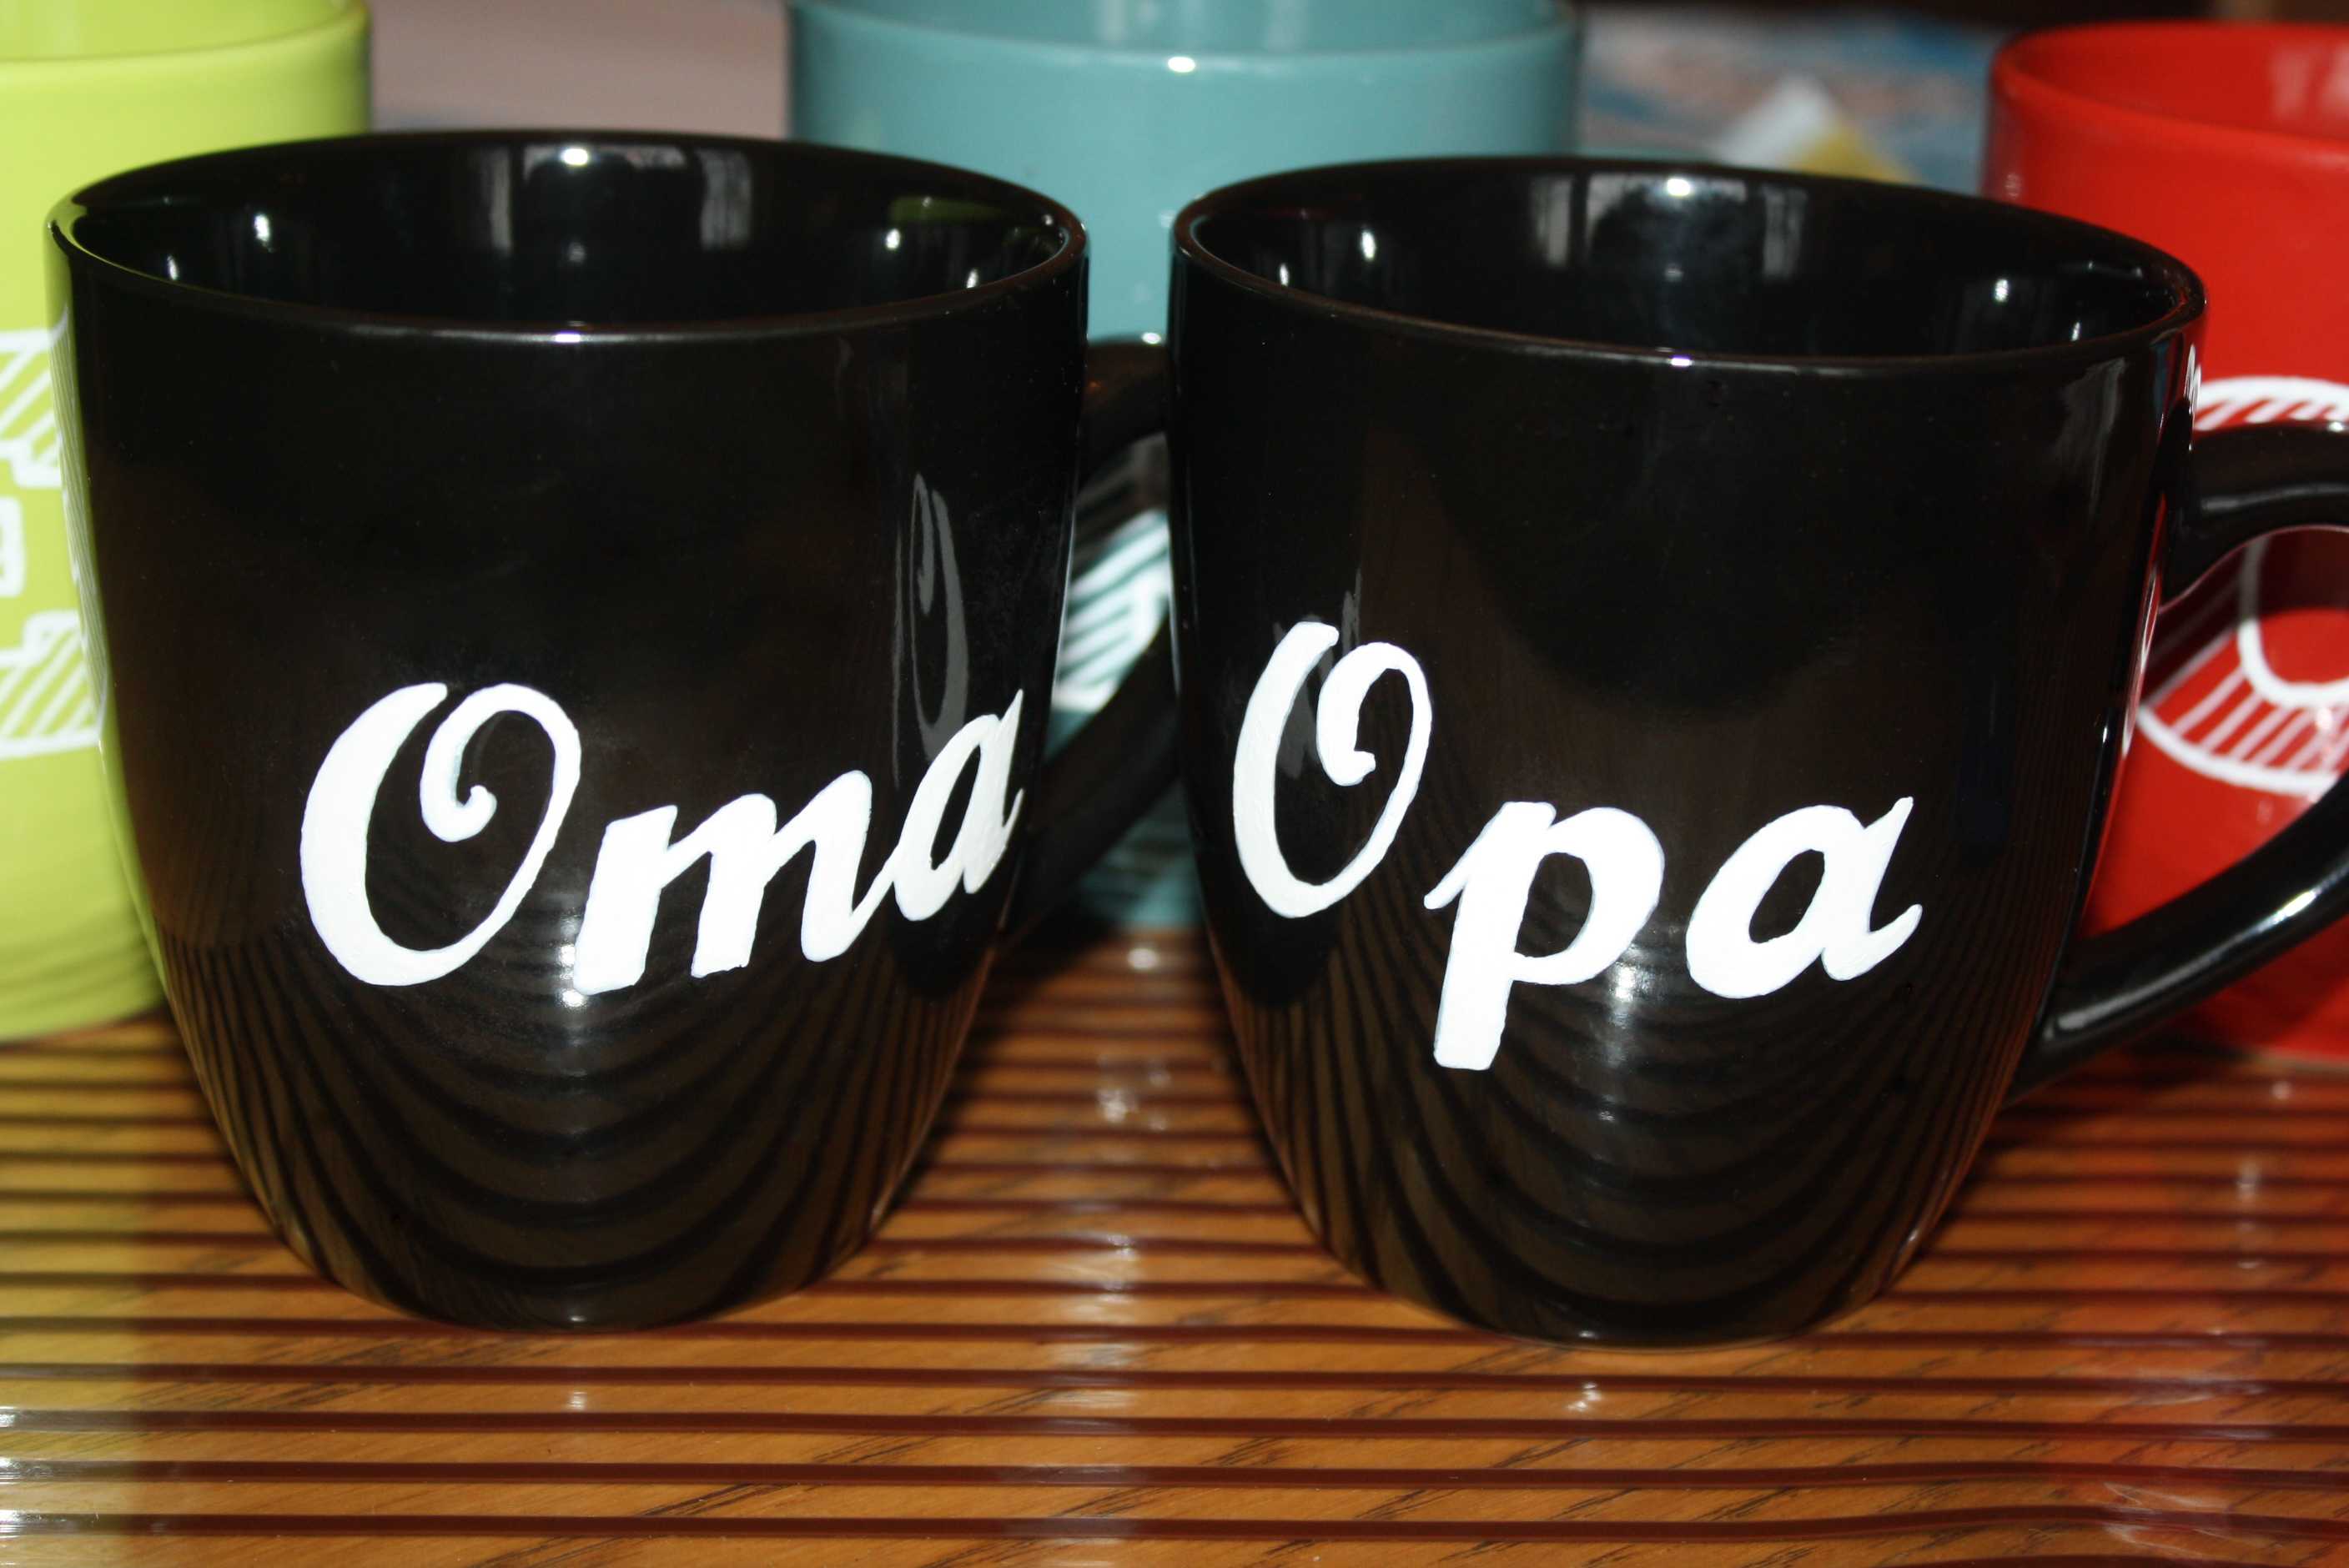
Monogrammed Mugs – DIY
Making these monogrammed mugs was a lot of fun and surprisingly easy. They’re a perfect addition to gifts of homemade hot cocoa mix, tea or coffee.
Thanks to DesignMom for the inspiration! Based on what we saw on her blog and on numerous others, we came up with our own versions.

How To Monogram Mugs
Select a font and print your word or letter according to the size of your mug. Keep it simple! We used Blackoak Std Font for the initials and Script MJ Bold for the words.

Gather your supplies – mugs, glass marker, transfer paper (we made our own), tape and printed letters or words.
To make your own transfer paper, simply colour a plain sheet of paper with a pencil. The graphite (or whatever it is) will be transferred onto the mug.

Cut out a piece of transfer paper slightly larger than the letter you want. Cut a square shape around your letter as well so that it fits nicely onto your mug.
Layer the transfer paper and your letter onto the mug. Tape on securely making sure the pencil side is facing the mug and the letter is facing you.

Using a pen, trace the outline of the letter on top of the printed letter.
Remove the paper. You should see a faint outline of the letter.
Now, trace the outline with your glass marker.
For a bolder look, allow to dry for a few minutes and trace over the writing one more time.
Next, either fill in the entire letter or draw diagonal lines as we did. You could also do polka dots, add different colours or whatever you’d like!
The great thing about these glass markers is that they aren’t permanent until you bake them in the oven. Soooo, if you don’t like something, you can always wash it off and try again.
When you’re happy with your work, allow them to rest for 4 hours or overnight. To set the paint and make it dishwasher safe, simply place on a cookie sheet and bake at 325 F for 30 minutes. Once they’ve cooled, wipe down your mugs. Voila, all done!
Add a pretty bow, a special treat and you’re gift is ready!

If you liked this article and want more, Subscribe Here. You’ll be inspired with new ideas, recipes and DIY’s throughout the year. It’s easy and I promise I’ll never share your contact info.