The Ultimate Guide to Drying Mint in a Dehydrator
Drying mint in a dehydrator is a convenient and effective way way to preserve mint’s vibrant flavour and aroma. I like using this method because it’s quick and efficient. If you have a dehydrator and want to preserve a lot of mint throughout the season, using the dehydrator is a good option. Here’s the complete how to!

But of course, it’s not the only option! Read: How to Prune, Harvest and Dry Mint for hanging to dry or putting small amounts in paper bags. For even more options get the book! From Garden to Table: Everyday Cooking with Herbs.
Why Use a Dehydrator for Drying Mint
While you can air dry mint by hanging or putting in a paper bag – see How to Prune, Harvest and Dry Mint using a dehydrator offers distinct advantages that ensure optimal results.
- Retains Flavor and Aroma: Dehydrators provide controlled temperature and airflow, allowing mint leaves to dry evenly while preserving their delicate flavour and aromatic oils. This results in dried mint that maintains its refreshing and minty essence, enhancing the taste of your dishes and beverages.
- Preserves Nutritional Value: The gentle and gradual drying process of a dehydrator helps retain the nutritional properties of mint leaves. Essential vitamins, minerals, and antioxidants are better preserved compared to other drying methods.
- Saves Time and Effort: Dehydrators offer a convenient and time-saving solution for drying mint. Unlike air drying or oven drying, which require constant monitoring and frequent flipping of leaves, a dehydrator automates the process. Let the dehydrator takes care of the drying.
- Uniform Drying: Dehydrators provide consistent heat and airflow, resulting in uniform drying of mint leaves. This ensures that all leaves dry at the same rate, reducing the risk of mold or spoilage due to uneven moisture content. You can expect a batch of uniformly dried mint that’s ready to be stored and used whenever you need it.
Read More: My favourite dehydrator.
Picking and Preparing Fresh Mint Leaves
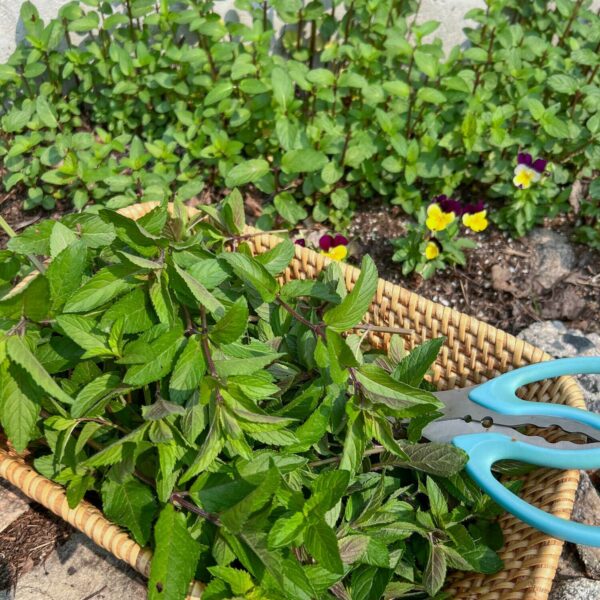
Mint can be harvested repeatedly throughout the season. I like picking early in the season before insects and harsh weather swings have damaged the plant. The bunch in this photo was harvested in early June – not bad for a location where the snow disappeared only a month before!
And, by harvesting early, you can have repeated harvests throughout the year. That means, plenty of dried mint to last throughout the winter.
Read more about where to cut and how to harvest: How to Prune, Harvest and Dry Mint
Steps to Dehydrating Mint
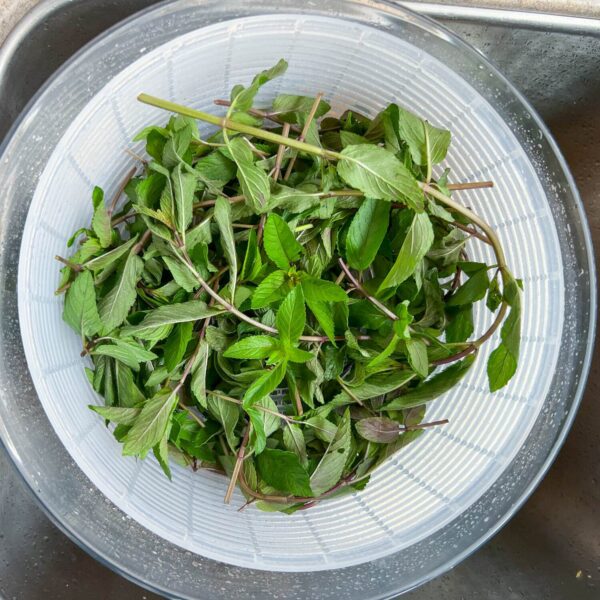
Step 1: Wash Mint
- Fill a bowl with cold water and swish the mint leaves to remove any blemishes, critters, or dirt.
- Repeat the process until the water remains clear, ensuring the mint is thoroughly clean.
Step 2: Dry Mint
- Use a salad spinner to remove excess moisture from the mint leaves or gently wrap them in a kitchen towel and dab to dry.
- Ensure the surface moisture is removed to prevent dark spots and mold formation. It will also speed the process of drying in the dehydrator by preventing moisture build up in the dehydrator.

Step 3: Trim and Remove Stems
- Remove the leaves from large stems.
- This way the mint will dry evenly and faster.
- If you wish you can dry the stems too, just put them on a separate try as they’ll need to stay in longer.
- If you insist, you could avoid this step and dry the leaves and stems together. You risk losing some flavour by over-drying the leaves. And be extra cautious to ensure the stems are properly dried. If they retain any moisture they could spoil the entire batch in storage.
Step 4: Keep Leaves Whole
- Maintain the mint leaves as whole as possible throughout the drying process.
- Avoid chopping the leaves into smaller pieces to preserve the essential oils and maximize flavor.
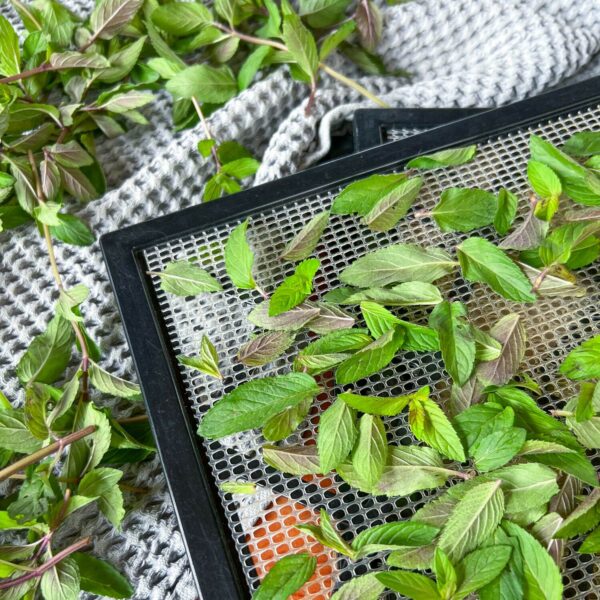
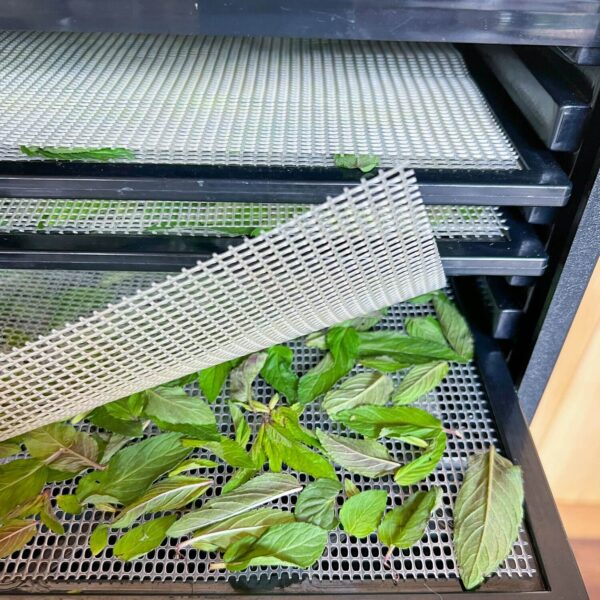
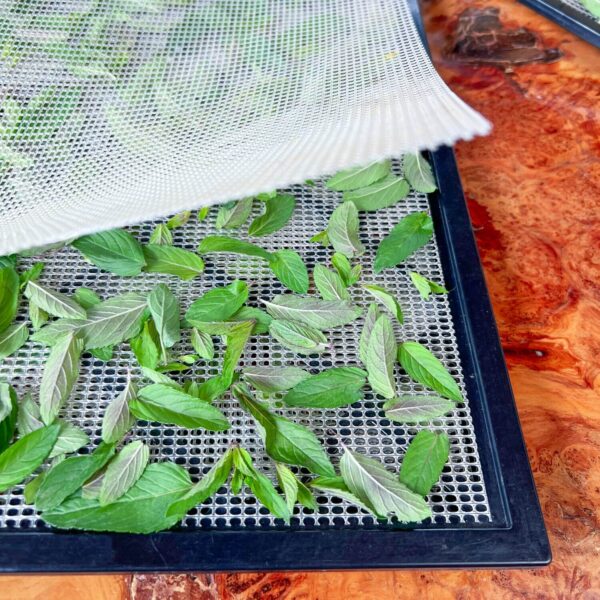
Step 5: Spread out on Mesh Tray
- Arrange the mint leaves evenly in a single layer on a mesh tray.
- If you have a large quantity of mint, use additional trays, and cover the top with another mesh liner to prevent leaves from blowing around during drying.
Step 6: Set Dehydrator
- Set the dehydrator to a temperature of 95°F or 35°C, suitable for drying herbs.
- This temperature helps retain the mint’s aroma and flavour.
Step 7: Check for Dryness
- Check the mint leaves after approximately 5 hours of drying. Depending on humidity, amount of mint, etc. it may take 5, 8 10 or even 12 hours. It’s so hard to say – but check at the 5 hour mark and you’ll have a better idea of how things are going. While you’re there, rotate the trays!
- The leaves should crinkle and crumble easily when touched. If they are still bendable, continue drying them.
Step 8: Store Dried Mint
- Allow the dried mint to cool completely before transferring it to an airtight container.
- Choose a container that is just large enough to hold all the dried mint, as excess air can degrade its flavour and colour over time.
How to Store Dried Mint
Read: How to Store Dried Herbs
To store your mint here are key tips:
- keep the leaves whole to retain as much flavor as possible
- store in a sealable glass jars that’s just big enough to fit the mint – jars too big expose the mint to too much oxygen
- store in a dark, dry place with consistent temperature
- only crumble them when ready to use
- use within one year for best flavour, although it will be safe indefinitely

How to Use Dried Mint
Here are some ways to use dried mint:
- To brew tea – either hot or cold.
- Make homemade tea blends – I like mixing mint and chamomile for a soothing comforting tea
- Infuse water
- Add to rubs and marinades, especially for Mediterranean or Moroccan inspired dishes
- Add to salads like tabbouleh
- Use in desserts like fruit salad
- Add when cooking peas, even frozen peas (trust me it’s delish!)
- Use in baking like chocolate mint brownies
- Add to seasoning blends
Recipe for Drying Mint in a Dehydrator

Using a Dehydrator to Dry Mint
Ingredients
- 8 cups fresh mint stalks
Instructions
- Wash mint and remove any blemished pieces.
- Dry in salad spinner or by patting dry with towel.
- Remove leaves from stems. (Dry stems separately if you wish, they'll take longer).
- Spread evenly on mesh tray. To prevent dried pieces from being blown around in the dehydrator, cover mint leaves with a mesh liner.
- Set dehydrator to 95°F or 35°C and dry for 5 hours. Check, rotate trays and add more time as needed. The leaves should be brittle and crumbly when completely dry. If they are bendy – keep drying!
- Cool completely (let rest for 2 hours) then pour into an air tight container just large enough to hold all the dried mint (avoid large airspace). DO NOT crumble the mint to try to save space – whole mint leaves will keep their flavour longer.
- Store airtight jars in cool, dark, dry space.
Video
Notes
Nutrition Facts (per serving)
What’s your favourite way of using dried mint? And, do you have a favourite variety? In this post, I was using chocolate mint – one of my favourites for tea! Let me know your thoughts in the comments below or tag me on Instagram @getgettys when you harvest some mint.
Want to know which type of mint you have? Watch my new video: 3 Types of Mint — how to tell the difference, use each one, and keep it contained.

Cook with the seasons, effortlessly! I’m Getty, a food educator and Professional Home Economist, helping you select, store, and serve seasonal ingredients in delicious, simple, everyday meals. Sign up for seasonal tips and recipes delivered straight to your inbox, and dive deeper with my books, guides, or YouTube content.