How to Make Sourdough Bread – A Beginner’s Recipe
 Also Read: Artisan No Knead Yeast Bread, Cottage Cheese Dill Bread (Yeast), 50/50 Whole Wheat Sandwich Bread (Yeast)
You Just Got Some Starter – Now What?!


1. Name Your Starter.
Name your starter and treat it like a living thing. Yup, your starter is a living entity made up of yeast and bacteria that need to be kept alive. Naming it helps get everyone in your household used to the idea that this is a living thing that needs to be cared for. Mine is called Hilde in honor of Hildegards Bakery where I got it from.2. Understand 2 Key Rules About Your Starter.


3. Assess and Get Your Starter into Shape.
Weigh your starter – 100 g of starter.
Add the same amount of water and flour to a glass container – 100 g water, 100 g flour. (Make sure your container can hold double to triple the amount).
Stir well. Mark a line on the container indicating the top of the starter. (use a rubber band, grease pencil or piece of tape)
Let rest on the counter for 6 hours.
From 6 hours on, look at your starter every hour and see if it continues to rise. Do you see bubbles, is it doubling, does it look lighter?
Make a note when you see that it starts deflating. That will be your starter growing time.
Let it deflate. Make a note of when it started deflating and what it looked like at its peak so you know what to expect when its time to bake bread.
At the end of this cycle, you’ll have more starter but it will be deflated again.
Restart the process all over again. This time start with 100 g of starter, put 50 grams in another jar and keep that in the fridge just in case.
If your starter performed well – it was bubbly, doubled in size and looked great. You’re ready to use 100 grams of starter and jump to the One Day Before Baking Bread stage down below to grow your starter for bread baking. If your starter wasn’t very bubbly or didn’t grow much at all, you need to repeat the feeding cycle a few more times. Repeat the above steps, tossing the excess starter. Do this a few times until you get bubbling and doubling. Sometimes you have to repeat this process three of four times to get the starter in tip top shape again (for example if you were away on holidays or it sat in the fridge for several weeks without feeding). If after 3 or 4 feedings your starter is not doubling in volume, you may need to replace your starter or do some more research on the sites listed below. You cannot make light, airy bread without light, airy starter! It has to be soft, bubbly and doubled in size. I cannot stress this enough!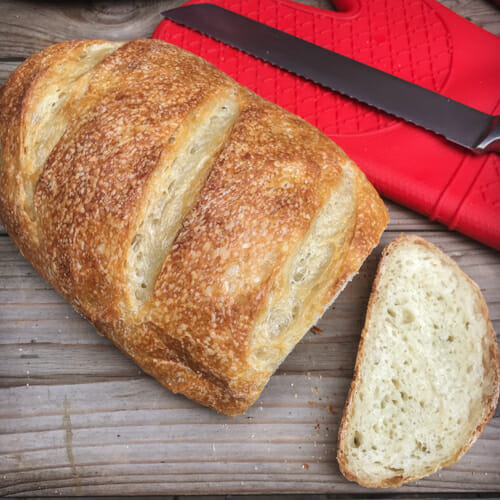
Ongoing Routine – Feeding and Keeping Your Sourdough Starter
There are SO many ways to keep and feed sourdough starter. Play around and figure out what works for you. Here’s the routine Hilde and I have settled into. I bake fresh bread about every 5 -7 days (2 loaves at a time). That means I can keep Hilde in the fridge and feed her the day before I bake bread. Here’s what works for me:One Day before Baking Day – Make The Baking Starter (Levain)
Remove the starter (Hilde) from the fridge and make the starter mix to use for baking (aka levain). In a large glass dish with a lid mix 100g (3.5 oz) starter 100g (3.5 oz) water 100g (3.5 oz) all purpose flour Loosely cover and let rest at room temperature for 8-10 hours (overnight, the day before baking works great). Expect this mix to double or more in size, so use a container that can easily hold at least twice the amount. This amount will make 2 big loaves. This mix is called the levain or baking starter. You know it’s ready to use in baking when it looks bubbly, has grown to double or more of its original size and if you drop a tablespoon full in a cup of water it floats. The leftover starter (Hilde) can be put back into the fridge – but you have to feed it first. See below.The Fridge Starter – Hilde who lives in the Fridge
Before you return the leftover starter to the fridge, feed it by adding more flour and water. The usual ratio I use is equal parts starter, flour and water. Start by measuring your remaining starter and add equal parts flour and water. If you feel like you have too much starter and it just keeps growing and growing, you may want to toss some of your starter (or try some of these ideas using excess starter). I like keeping 50 grams of starter. This will be enough to make a new levain (for baking) and to continue to grow starter in the fridge. 50g (1.7 oz) starter 50g (1.7 oz) water 50g (1.7 oz) flour Mix well and store in fridge. You’ll have a total weight of 150 g. If any liquid forms on the starter, just stir it in.Baking Sourdough Bread
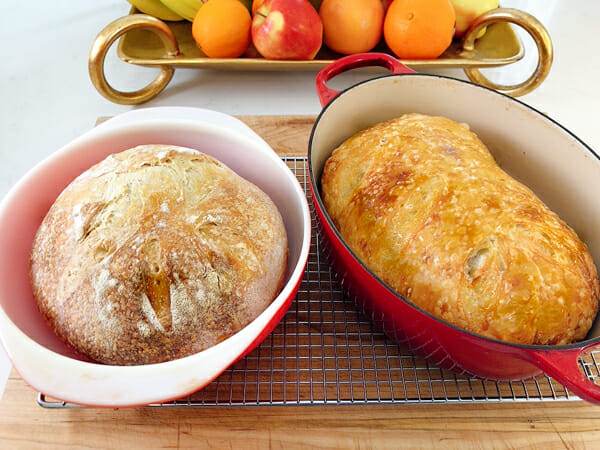
I typically bake two loaves at a time. I only have one cast iron dish with a lid. So I bake one in a dish and one on a baking sheet or in a oven proof glass dish with a lid (pyrex). They produce different looks as shown below. The one on the left was on the baking sheet, the one on the right in the cast iron dish.
My Sourdough Bread Recipe

Sourdough Bread Recipe
Ingredients
- 300 g of baking starter (levain)
- 625 g of lukewarm water
- 1 kg all purpose or bread flour
- 15 g vital wheat gluten* optional
- 15 g salt
- 1 Tbsp canola oil divided
- 1 Tbsp cornmeal optional
Instructions
- Mix all ingredients except oil and cornmeal in a large bowl. Let rest for 10 minutes to allow flour to really absorb the water.
- Knead into a soft, pliable dough. It will feel very sticky at first, but as you knead it will stiffen up. Add a little flour to help, but try to work past the stickiness without adding too much flour. The final dough will be tacky and soft.
- Coat dough and bowl in 1/4 Tbsp oil.
- Cover and rest dough for 4 hours. This is called proofing or the first rise.
- At every 30 minutes for the first 2 hours of proofing (total of 4 times) stretch the dough. Slide hand down side of bowl, grab dough from bottom, stretch it up and fold over the top. Repeat this in the four directions of the compass. Flip the dough so the folds are facing down. Cover and continue to let rest.
- An hour before baking, separate dough into halves.
- Coat baking sheet or cast iron dish in oil. Sprinkle bottom (only where dough will rest) with cornmeal if using.
- Shape dough by pulling and stretching into log or round as desired. Make the top smooth by pulling extra dough to bottom. Place on or in baking dish.
- Cover and let rise for 1 hour. After the first 30 minutes, preheat oven to 450°F.
- Just before putting bread in oven, use a very sharp knife to score the top. This lets steam escape and prevents bread from bursting open at odd places.
- Bake on high heat (450°F) for 20 minutes. If using a baking dish keep lid closed for this portion.
- At 20 minutes, reduce heat to 400°F and remove lid. Bake for additional 20-30 minutes.
- If baking one loaf in a cast iron dish and one on a baking sheet, the baking sheet loaf will likely be done a few minutes before the dish loaf.
- To check for doneness...
- - look for a nice golden brown color (if it is getting too dark, cover loosely with tin foil)
- - tap bottom of loaf and listen for hollow sound
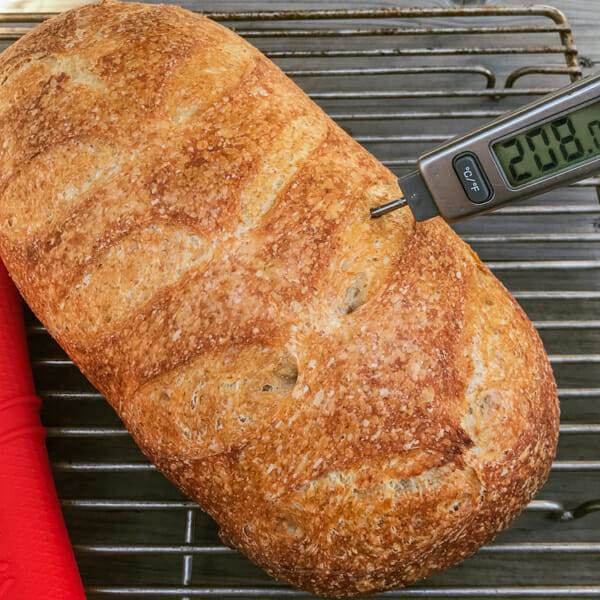
- - insert instant read thermometer, sourdough should be at 97°C or 208°F
- Remove from oven and let cool on wire rack for at least 1 hour before slicing. It is very difficult to cut bread fresh from the oven.
- Enjoy.
- Once it has completely cooled, store in plastic bag. Freeze extra loaf in tightly sealed bag for another day. To use, simply thaw overnight.
Notes
The Little Things
Here are a few little things that I’ve picked up along the way. I know there’s tons more to learn, but we’re up to the taste testing challenge!- You’ll notice that I use grams and weigh all the ingredients. If you’re used to measuring by cups, this will be annoying, but it can’t be helped. This is because the starter changes volume as it bubbles and grows. The only consistent way to measure the starter is by weight. Trust me, I tried to use cup measurements, but the results were very inconsistent. Weighing is the way to go. I use this Oxo scale for all my kitchen needs.
- I use filtered drinking water that’s at room temp. I’ve read that chlorine is not great for sourdough starters, so I use the water that runs through our Brita jug. Does it make a difference? I can’t say for sure, but the results are great so why mess with it.
- I’m still experimenting with how long and at what temperature to let the dough proof. I have let the dough proof overnight at cool temperatures and I have proofed it for 2-4 hours in the oven with the oven light on for warmth. Can’t decide which is better, both ways has produced nice loaves.
- I am still experimenting with adding salt 30 minutes or so after mixing the other bread dough ingredients. I’ve read that salt slows fermentation of the sourdough and impacts the gluten formation. But there seems to be mixed reviews as to whether or not it’s worth the wait and extra mixing. Right now, I’m mixing all ingredients (except salt) with a wooden spoon and letting it rest for 10 minutes before adding the salt. Then I knead everything for a good 10 minutes.
- Slashing the bread just before putting it in the oven is not just decorative – it’s vital to control blow outs. Use the sharpest knife you have or use kitchen shears.
- The longer the rise time the more sour the sourdough becomes.
- Adding whole wheat flour feeds the acid producing bacteria so the bread becomes a little more sour.
- You can bake your bread in just about any pot or dish that can withstand high heat. I have baked my bread on a baking sheet, in a glass pyrex casserole dish with a lid and in a cast iron pan.
Starter Recipe
If you don’t have a starter, here’s a recipe from The Clever Carrot to Make Your Own Starter.Handy Resources and Links
If you want more knowledgeable advice and guidance for how to bake sourdough bread and feed your starter check out these links. You’ll get the full explanations, hints and lingo to totally immerse yourself in the world of sourdough. I’ve found these sites very helpful. Good luck! The Clever Carrot – Beginner’s Guide to Sourdough The Perfect Loaf – Beginner’s Sourdough Bread King Arthur Flour – Sourdough I can’t wait to see your results, please share your experience with me or tag your photos on Instagram with @getgettys so I can like your results.
Cook with the seasons, effortlessly! I’m Getty, a food educator and Professional Home Economist, helping you select, store, and serve seasonal ingredients in delicious, simple, everyday meals. Sign up for seasonal tips and recipes delivered straight to your inbox, and dive deeper with my books, guides, or YouTube content.
Getty Stewart is a participant in the Amazon Services LLC Associates Program, an affiliate advertising program designed to provide a means for sites to earn advertising fees by advertising and linking to Amazon.com.