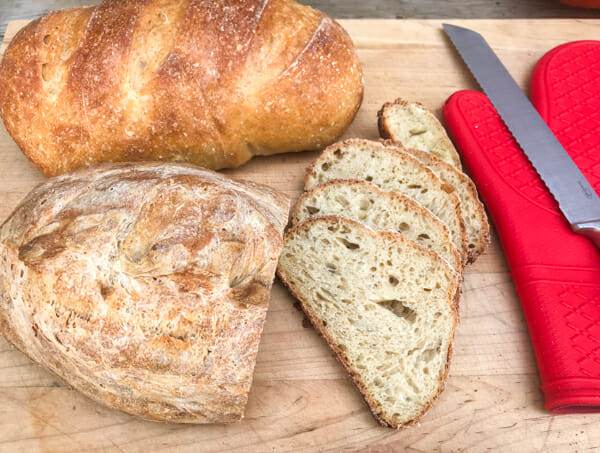
Learn how to store bread so it doesn’t get stale, dry out or go moldy. These tips work for both store bought bread and homemade bread, whether a nice sourdough, light sandwich bread or artisan yeast bread.
How to store sliced, whole, store bought or homemade bread.
False – You can’t cut around mold on bread; toss the whole loaf.
False – Bread boxes actually do work!
True – Freezing is an excellent way to store bread. You can even re-freeze it several times.
Continue reading for more details.
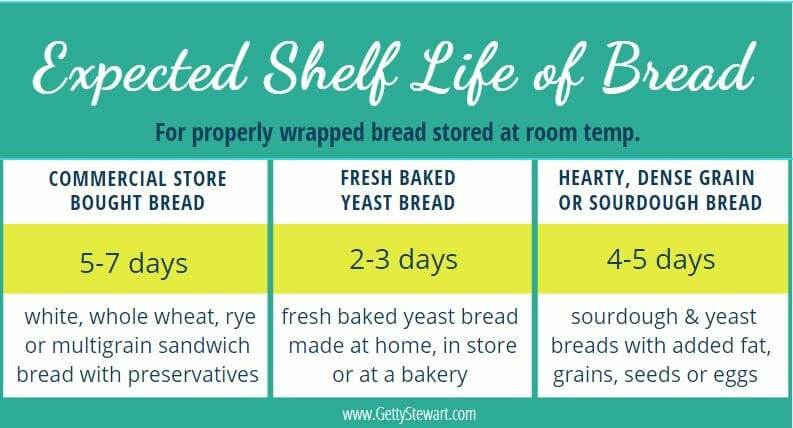
Expected Shelf Life of Different Breads
Before we get to bread storing tips and techniques, here’s a look at how long we can expect different types of bread to last. A good reminder, that no matter what we do, we can’t make bread last forever!
How to Store Bread Effectively
To get the longest shelf life, we need to control for air circulation, humidity and temperature. Here are some techniques that will help us do so.
1. Keep the Original Package
Trust retailers and bakeries to know what they’re doing!
Keep store bought sandwich bread in the original plastic bag and keep at room temperature. After opening, push out as much air as possible and seal well.
Keep fresh baked bread sold in paper bags, in paper bags. This allows enough air circulation to let out any warmth or moisture from fresh baked bread. Once you’re certain the bread has completely cooled, roll the paper bag shut.
2. Cool Fresh Baked Bread Before Storing or Freezing
Let fresh baked bread cool completely, at least two hours before storing or freezing (see below).
3. Wrap Bread
A paper bag or linen bread bag is ideal. These bags allow moisture to move out and away from the bread. This helps prevent the crust from getting too chewy or leathery while keeping the inside soft. They also help slow down the growth of mold compared to plastic bags.
You can also wrap your bread in soft kitchen towels or in reuseable beeswax covers.
A sealed plastic bag is fine for any breads that don’t have a rustic, thick crust. If all you have is a plastic bag for your crusty bread, leave the bag open so there’s a little air flow to allow the crust to stay crispy instead of chewy.
Oh and remember, whenever you open a bag to take a piece of bread out, it’s important to push out all the air and reseal it tightly.
4. Store at Room Temperature
The best storage temperature for bread is a consistent 20°C or 68°F – room temperature.
Bread stored in the fridge will go stale three times more quickly than bread stored on the counter. That’s why you’ll often hear the recommendation not to store bread in the fridge.
The Exception:If you live in an extremely hot, humid climate where you’re more concerned about mold than stale bread, you can keep one or two days worth of bread in the fridge instead of the counter. Better yet, keep your bread in the freezer and take out what you need, when you need it.
5. Store in a Bread Box or Cupboard
The vents or air holes built into a bread box give it just the right amount of air circulation to keep bread soft and fresh and slow the growth of mold. But don’t overcrowd the box; the more bread there is, the more humidity will build. With that in mind, bigger boxes are better for more air flow, but the material and brand of bread box doesn’t really matter.
Instead of a bread box, we store our bread in a kitchen cupboard.
In my house, we store bread in one of the kitchen cupboards.
6. Only Store What You Can Eat, Freeze Extras
The best strategy for avoiding bread waste is to only buy and store what you can reasonably expect to use within 2-3 days – less if your climate isn’t bread friendly (hot & humid).
If all you have access to is full sized loaves, split the loaves and store only what you’ll use in 2 or 3 days and freeze the extras. Bread from the freezer will retain excellent quality for at least 3 months and will be the closest you’ll get to the taste of fresh bread.
To freeze bread, place in a freezer quality plastic bag. Remove all air and seal tightly.
You can freeze whole, half or quarter loaves. You can also pre-slice bread or freeze sliced loaves. The key is to freeze it in a way that is most convenient for your everyday use.
To use, take out slices and put directly in toaster or thaw and enjoy. Thaw whole or half loaves overnight but remove from plastic bag to avoid soggy bottoms.
Pre-slice bread before freezing to make it more convenient to get just as much as you need. Remove all air and seal in plastic bag. To make slices easier to separate, stagger them slightly.
How to Refresh Stale Bread
If you end up with a loaf of bread, a baguette or some buns that are a little dry or stale but still good, you can perk them up and restore some of that fresh baked effect. But you’ll need to use your revived bread right away, as it will only stay refreshed for a few hours.
Whole or Partial Loaves of Crusty Bread (baguettes, French bread, Sourdough, etc.)
Thoroughly wet your loaf of bread by running under the tap and getting all sides wet.
Wrap in aluminum foil.
Place in cold oven, turn oven on to 180°C/350°F and steam bake for 20-25 minutes (15 minutes for baguettes).
Remove foil and continue to bake for 5 minutes to crisp up the crust.
Enjoy right away because it will turn stale again within a couple of hours.
Soft Breads and Slices
Your best bet for slices is to toast them.
If you want to do a whole loaf of soft sandwich style bread. Do the same as above, but do not soak with water first.
Wrap in aluminum foil.
Place in cold oven, turn oven on to 180°C/350°F and bake for 20-25 minutes (15 minutes for baguettes).
Remove foil and continue to bake for 5 minutes to crisp up the crust.
Enjoy right away, it will turn stale again within a couple of hours.
What Can You Do With Moldy Bread?
Nothing. Don’t eat any part of a loaf of bread that has mold on it. Toss it.
Mold is a fast, deep growing fungus that will take over a loaf of bread quickly. If you see a bit of mold in one corner, you really only see the tip of the iceberg, the thread like roots of mold will be spread throughout the entire loaf. The USDA, the National Center for Home Food Preservation, Health Canada and other health organizations all agree that it is not safe to eat any part of a loaf of bread on which mold has been spotted. You should toss the entire loaf of moldy bread.
If you live in a warm, humid environment, you need to be extra cautious to protect against mold spores. They love this climate and are just waiting for some nice squishy bread to call home. They will settle in almost immediately. You have to take evasive action!
Your best bet is to keep your bread in the freezer and take out what you need when you need it. Slice bread ahead of time and stagger how you line it up in the bag so it’ll be easy to separate just one piece at a time.
It’s also interesting to note that soft, airy white bread is more prone to mold than denser, darker breads such as rye, sourdough, whole wheat and whole grain.
I hope this helps you find a convenient and practical way to store your bread. I know sometimes the textbook methods aren’t always practical and we need to compromise. Do what works for you and helps reduce unnecessary food waste.
More Bread Articles
Make Homemade Bread CrumbsHow to Make Croutons11 Ways to Use Extra Bread
Share your favorite way to store bread in the comments below or share your photos and ideas with me on instagram @getgettys or Facebook @GettyStewart.HomeEconomist.
Getty Stewart is a Professional Home Economist, speaker, frequent media guest and writer dedicated to putting good food on tables and agendas. She is the author of several recipe books on enjoying and preserving fruit, Founder of Fruit Share, a mom and veggie gardener.


 I hope this helps you find a convenient and practical way to store your bread. I know sometimes the textbook methods aren’t always practical and we need to compromise. Do what works for you and helps reduce unnecessary food waste.


 I hope this helps you find a convenient and practical way to store your bread. I know sometimes the textbook methods aren’t always practical and we need to compromise. Do what works for you and helps reduce unnecessary food waste.